.

.

.

.

Showing posts with label wild flower. Show all posts

Thursday, 22 June 2017

Lighthouse Father's Day Shaker Card || First Edition Wild Flower

Hi all,

So I know Father's Day has been and gone but I wanted to share the card I made for my dad. I didn't want to blog about it beforehand and ruin the surprise as he is a good one and appreciates handmade cards.

The instructions are below the photo so you can make your own shaker card! The papers I used are from the First Edition Wild Flower paper pad by Trimcraft.


1.       Cut the thick part of a blank photo frame down so that all side are equal.
2.       Cut 2 squares of acetate and 1 of patterned paper the same size as the outside of the photo frame.
3.       Stick thin tape around the edge of one square of acetate, stick the other to it and before you seal it, fill with sequins.
4.       Stick more thin tape around the outside of the pocket and stick to the frame. Stick the square of coloured paper to the back of the pocket.
5.       Die cut a lighthouse from patterned paper and add detail with 3D Pearl Effects. Stick to the frame.
6.       Cut a 13cm square of coloured cardstock and stick to a 13.5cm card blank.
7.       Cut 2 rectangles from patterned paper, one 7x13cm and the other 7x2cm. Stick one on each side of the coloured cardstock.
8.       Stick your shaker pocket on top of the card, in the centre.
9.       Die cut three portholes, stick along the bottom of the card and add ‘dad’ on top of them.
10.   Using the inside of the portholes, stick down the left side of the card and add a small button in the centre of each with a little twine threaded through.

While I'm here, here's another card made using the same collection.


Thanks for stopping by!
Emily xx


Tuesday, 13 June 2017

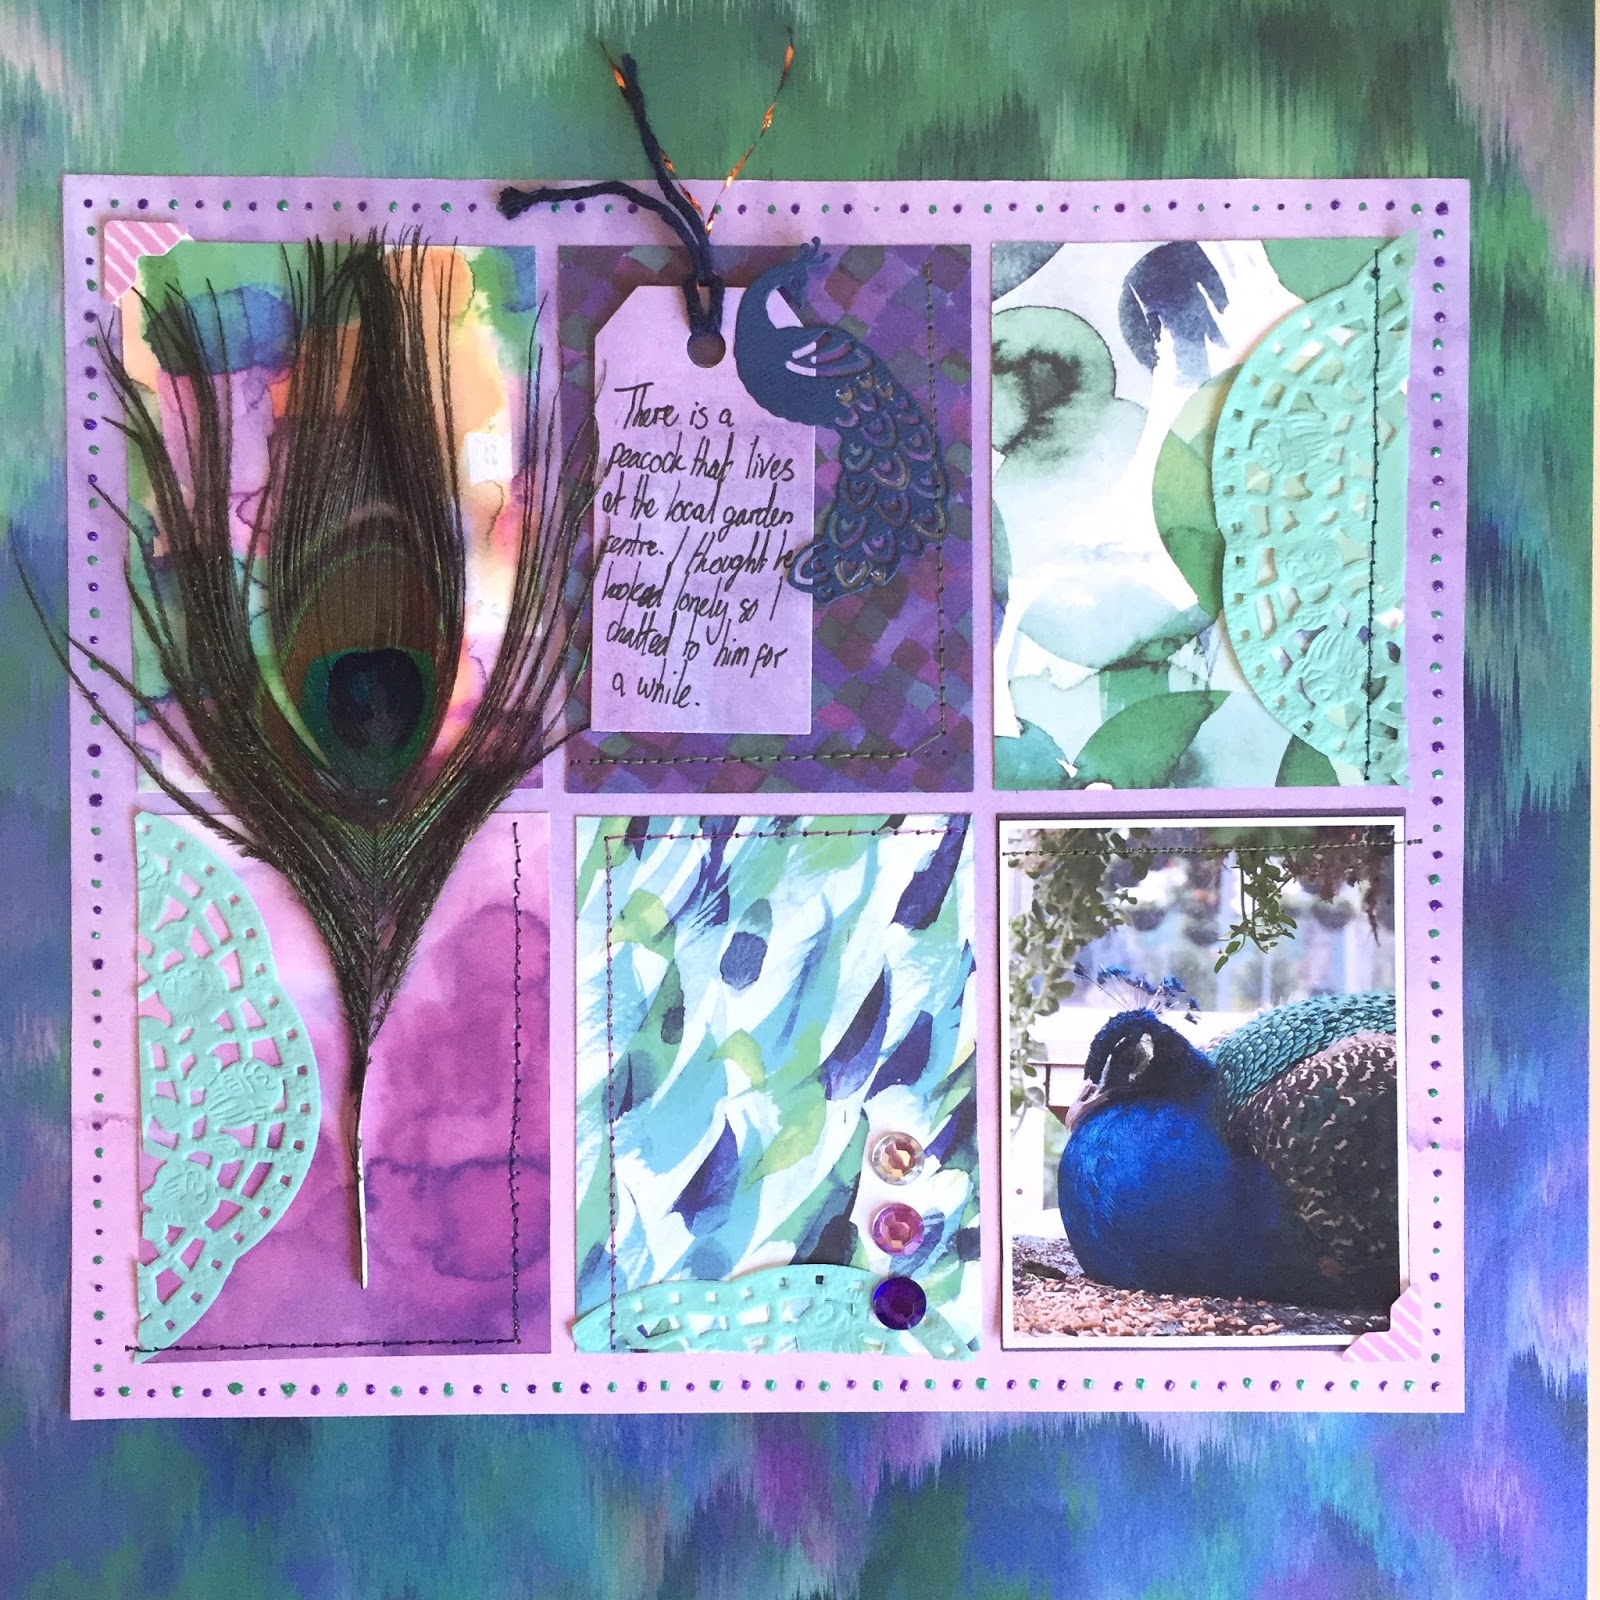
Peacock || Scrapbook Layout || First Edition 'Wild Flower'

Hi all,

I have a layout to share today using the First Edition 'Wild Flower' paper pad by Trimcraft and a picture of the lone (poor thing) peacock that resides at a local garden centre I visit a lot with my parents (what can I say, they do fantastic breakfasts!)


  1. Print your photograph at 3x4".
  2. Cut 5 3x4" pieces from patterned paper. Arrange with the photo onto a larger piece of patterned paper so they are equal distance apart, stick down and cut around the hole thing, leaving a small border. 
  3. Add some embellishments like doilies and tags on top of the cards.
  4. (Optional) Stitch around some edges of the little cards in co-ordinating colours.
  5. Using 3D Pearl Effects, add dots around the edge of the papers.
  6. Stick the whole thing onto a 12x12" sheet of patterned paper.
  7. Finish with journalling, gems, die cuts and a peacock feather.
Thanks for stopping by!
Emily xx

Tuesday, 30 May 2017

York || Scrapbook Layout || First Edition 'Wild Flower' || Step By Step

Hi all,

I have a pretty, watercolour-y scrapbook layout to share today using the First Edition 'Wild Flower' paper pad by Trimcraft. 

The picture is of the ruins in the Museum Gardens in York. 


Step by step:


  1. Spread gesso across the centre of the page and allow to dry.
  2. Scribble purple gelato or paint purple watercolour onto plastic packaging, add water and then smoosh onto the gesso.
  3. Cut two strips from 12x12" paper, one 1" wide and the other 3" wide. Stick to the page, leaving a small gap in between.
  4. Add a length of ribbon and a length of washi tape in the gap between the patterned paper. 
  5. Print your photo at 3x4" and mount a couple of times with patterned paper. Stick down in the centre of the page.
  6. Die cut several pennants from patterned paper and textured cardstock, layer and stick to the top left and bottom right of the page using a stapler. 
  7. Add floral stickers and a title.
  8. Finish with ink spatters, adhesive gems, buttons and flowers.
Thanks for stopping by!
Emily xx