.

.

.

.

Showing posts with label layering. Show all posts

Tuesday, 2 May 2017

Betsy Ann Poole || Scrapbook Layout || My Botanic Garden || Cherish The Memory DT

Hello!

Today I have a layout to share using a photograph of my great-great-grandmother, Betsy-Ann Poole. I was shown the picture when I was at my grandparents' house a couple weeks ago. I took a picture of the picture on my phone - I love to scrap old photographs, and family history really interests me. Not sure why, I think I am just curious.


I recently got on the 'Cherish The Memory' design team, and the 'My Botanic Garden' collection by StudioLight was in my kit and it was perfect for a layout using an old photograph.

This layout may look complicated but it really isn't if you break it up into little steps:

  1. Cover the area behind where you know your picture and ephemera will sit, with gesso.
  2. Use the packaging technique to smoosh co-ordinating watercolours onto the background.
  3. Stamp around the area with a pattern stamp.
  4. Print your photo and mount.
  5. Cut a selection of patterned papers and arrange behind the photo, along with tags and other ephemera. Most of what I used here is from a 12x12" sheet that I cut apart. 
  6. Add more pattern stamping and embellish. 


 I don't think I'd do vintage all the time but it is a nice change when I do do it. I love all the layers and ephemera in this collection - there are die cut and decoupage sheets available as well as the 12x12" papers. You can buy the collections from Cherish The Memory HERE.

Thanks for stopping by!
Emily xx

Saturday, 8 April 2017

Arthur's Seat || Scrapbook Layout

Hello hello hello!

I have a new layout to share with you today. The pictures are from when Nathan and I climbed Arthur's Seat on our trip to Edinburgh. 
We originally tried to go up Calton Hill (the smaller hill which was near our hotel) but couldn't work out how to get there so instead we decided upon Arthur's Seat. That's when I took the second picture down. 

Eventually we go top and the views were awesome. 


The backing paper here is from the Shimelle 'Little By Little' collection. I love mixed media but whenever I try to do a background I'm never happy with it and I liked the painted effect on this paper. In the end I cut it in half and flipped one side over as I loved the side with cameras on it too and it added more interest to the background. The papers are simply taped together at the back, you can't really see the join as it is covered with the photographs. This layout was super simple to make but it turned out so well!

Thanks for stopping by!
Emily xx

Tuesday, 13 September 2016

Craft Consortium Santoro Kori Kumi Cards!

Hi all,

So you may recall a week or so ago, I posted a video announcing that I was accepted onto the Craft Consortium design team. I went through what I had been sent in my first kit and if you haven't seen that video then you can check it out here.

The following Monday I made three cards and sent them off to CC... there was a show on Hochanda the following Monday evening (September 12th) and some samples were needed.... Very exciting stuff and I didn't want to miss out....

So on Monday evening I turned on my TV... and my cards were on there! All three were used in a slideshow and then the presenter showed one of them too.

Here are the cards I made for the show and a little more about how I made them.

I'll admit I spent a few days dithering about what I wanted to make but I took a step back and did what I do best - layering and some machine stitching.

The decoupage in the Kori Kumi collection is quite large but they look great as a centrepiece for a 6x6" card.


But if you want to do a smaller card like this then why not leave out the bottom layer of decoupage and use something else like this embossed piece of textured cardstock. (The apple embossing folder is part of this collection)

This one has a hint of glitter - I used glitter glue on her skirt and on the hearts. I also used Papermania glitter pens on the wood veneer and to outline bits of the card - you know I love a bit of sparkle!


Thanks for stopping by!
Emily xx


Sunday, 13 September 2015

A(nother) Selfie Layout

Hi all! Hope you've had a good weekend.

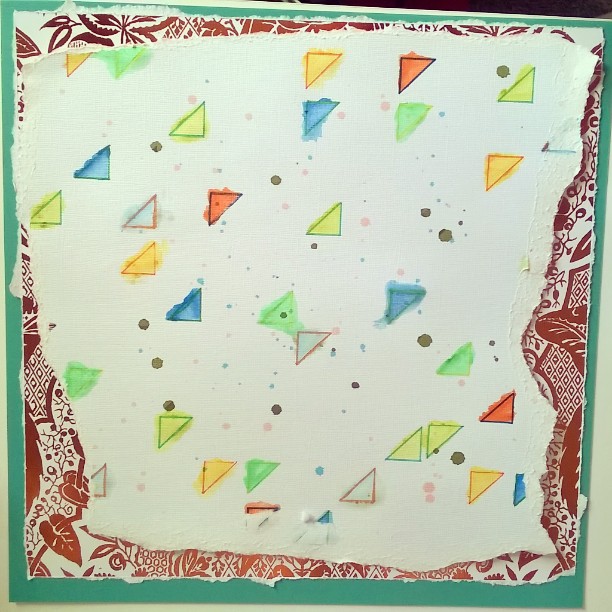
Been trying to think outside the box a bit more with my scrapping lately. Here's the background I came up with, using watercolour pencils on a stencil and outlining them with watercolour pens.
I ripped it, and layered it onto foiled paper (you can't tell from the photo..) and then onto plain teal paper. Colours I wouldn't normally use (orange is my least favourite) but it felt right using them so I just went with it. 


So the other day I went for a walk to the retail park with my better half.. I couldn't waste one of the last warm days we'll get this year. I picked up these fab My Mind's Eye goodies in TKMaxx.

I couldn't wait to use them on a layout. 
So I take a lot of selfies with my fella. What of it? At least then I've always got something to scrap...


One thing I'll say is that I shouldn't have stuck those flowers on with a glue gun... in retrospect I should've left them out and added more stencilled triangles instead. Ah well. 

Until next time...!


Saturday, 5 September 2015

Birthday layout

Hi all

Before I immerse myself into the behemoth that is Christmas Crafting, I made a layout using pictures from my birthday and party.

I hand drew the bubble writing... Just drawing guide lines and filling them in with colour is all you need to do!
To get your pictures into 'film strips', first crop them into squares (or use instagram and save the pictures from Facebook) and when you go to print, select up to nine photos and print wallet size on A4 which prints 9 to a page. The pictures will all be lined up ready to cut out.

Music has always inspired my creative work. The title "Twenty One & Invincible" is the title of a Something Corporate song I loved when I was younger,  and still do. If you want a listen, it's HERE

Have a good weekend!
Emily xx


Saturday, 29 August 2015

Mini Layout

Hi all

A new layout today! Here's my car :)


This is one of my heaviest layouts - I'm trying to get away from my fear of using lots of layers of paper... and it's worked so well.
You know how sometimes there's things in your stash that are so lovely you keep them for the perfect occasion?
That postcard is perfect. It's even got 'Mini' on it!
And also applies to me because I'm tiny.
I coloured the word 'mini' in and framed it to emphasise it as a page title.

The same goes for the First Edition Man Made Mini print paper. It's been in my stash for years and I finally got to use it!


Papers and embellishments are mostly My Mind's Eye Cut & Paste.

Anyway, until next time...!