.

.

.

.

Tuesday, 20 June 2017

8x8" Scrapbook Layouts || Dovecraft Goody Bags

Hi all,

I have some layouts to share today that I did in my little 8x8" scrapbook, using the pink and black Dovecraft goody bags by Trimcraft. 

This first one uses die cut circles and a fine liner to add sketchy interest to the page. The picture has a little bit of colour but not so much that it distracts from the rest of the page.

Remember that card I shared last week that had lots of hearts die cut from the front? This layout uses the hearts that were die cut. Clever, eh?


Thanks for stopping by!
Emily xx

Saturday, 17 June 2017

How To Use A Cut File Without A Silhouette Machine

Hi all,

Today I have something to share which blew my mind when I found out.
You can use a cut file without a cutting machine!

I found out during a National Scrapbook Day challenge where the use of a cut file was required. You can print the cut file on your computer and use it as a printable.
What I chose to do was open an A4 document in Photoshop, add the mandala design twice and have it overlapping the edge both times. I printed it onto A4 cardstock.


This layout was the perfect opportunity to use up some of the Papermania Neon collection that I adored a couple years ago. I traced around the edge of the mandalas with PVA glue and then added the glitter. This was quite time consuming as I could only add one colour of glitter at a time but I was so pleased with the result.
I also used neon paint in pink and yellow to fill in some areas of the mandalas. I added neon gems, 3D pearl effects and neon tassels too. 
I printed my photo to 3x4" and mounted onto neon cardstock. I added neon glitter strips around the layout, sequins and neon buttons to finish off.

Thanks for stopping by!
Emily xx

Thursday, 15 June 2017

I Think Pink Is My Colour || Card Tutorials || Dovecraft Pink Goody Bag

Hi all,

I have some cards to share today, along with some step by step instructions so you can try making them for yourself. 
They are all made using the Dovecraft pink goody bag from Trimcraft (they come in other colours too, I received the pink and black in my design team kit.) I also used a little of the black for one of the cards.


  1.  Cut two 5x14cm rectangles from textured cardstock. Mark the centre both vertically and horizontally and die cut a heart directly in the centre. Die cut another equidistant from this heart and the top, and the same from the bottom. Do this for the other piece of cardstock too.
  2. Cut another 5x14cm piece, this time from patterned paper. Add three of the die cut hearts down the centre, using the pieces you cut them from as a template. Use 3D foam tape for this so they stand out. Add 3D pearl effects around the edges of the top and bottom.
  3. Cut two more 5x14cm pieces of patterned paper. Using the pieces the hearts are die cut from, stick them on top with 3D foam dots. 
  4. In the top heart of one and bottom of the other, stick small buttons.
  5. In the top and bottom of the opposites, die cut a filigree heart and add to the centre.
  6. Arrange all three pieces on a 6x6" card blanks.
  7. Finish with a sentiment and adhesive gems.


  1. Cut a piece of patterned paper to 14.5cm square and stick to a 6x6" card blank.
  2. Layer up paper flowers, alternating between pink and black. Add a large adhesive gem in the centre. Stick to a die cut star. Add thread behind each layer to add texture.
  3. Stick this to two small rectangles of patterned paper and then stick to the card.
  4. Die cut small gears and tuck in between the flowers and layered papers.
  5. Die cut a sentiment and stick to the card.
  6. Add ribbon on either side of the card.
  7. Finish with ink spatters.


  1. Take a card blank from the goody bag.
  2. Using small heart dies, arrange on the card blank front and die cut. Keep going until there are apertures across the front of the card.
  3. Using up scraps, stick a scrap behind each aperture and leave to dry.
  4. Add patterned paper on the inside of the card to cover up the back of the scraps and ensure a professional finish for your recipient.
  5. Finish with a sentiment. 
Thanks for stopping by!
Emily xx

Tuesday, 13 June 2017

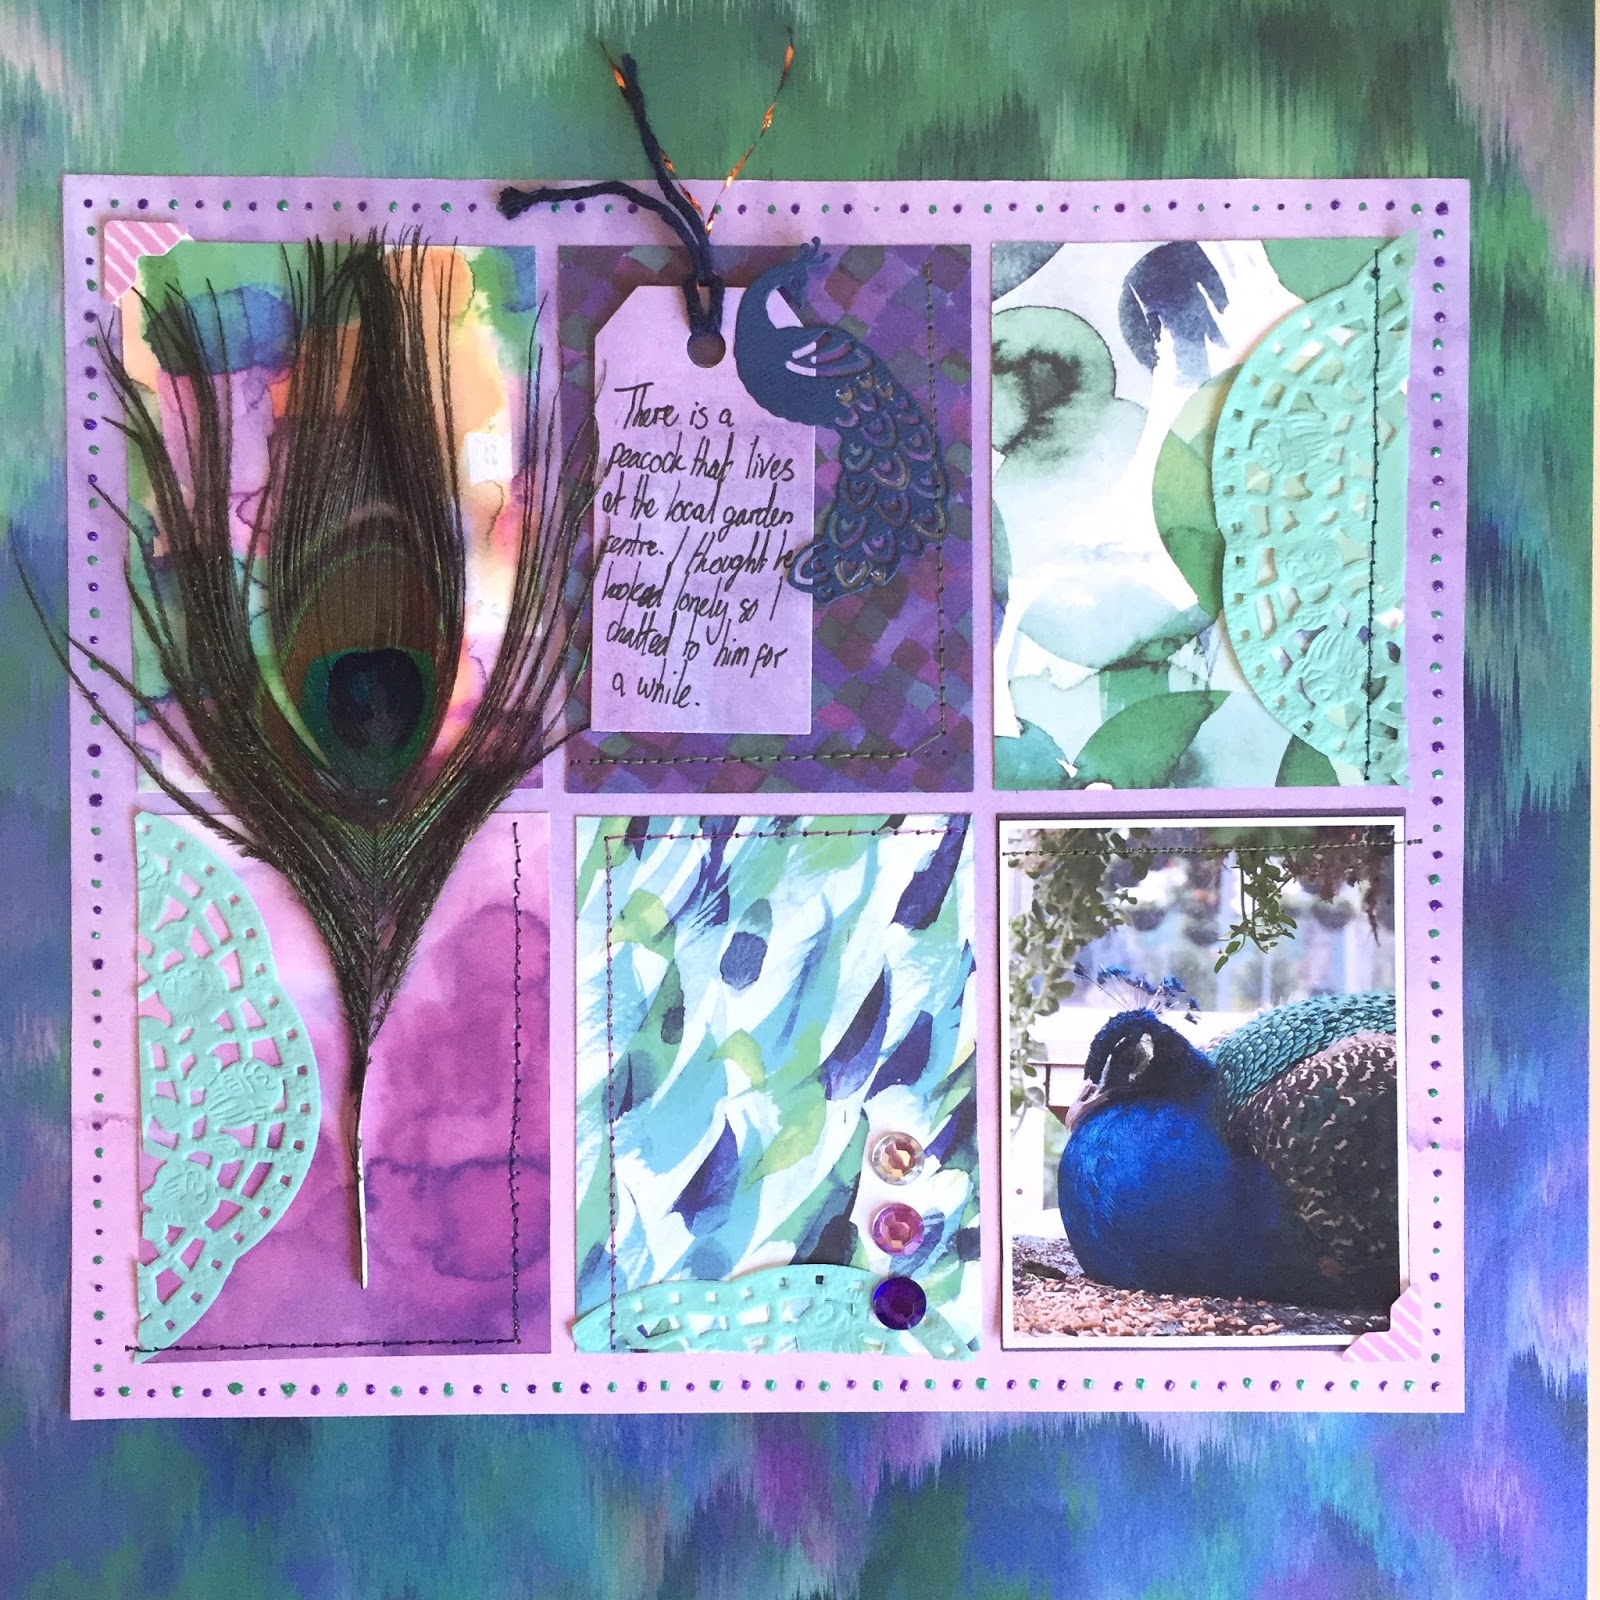
Peacock || Scrapbook Layout || First Edition 'Wild Flower'

Hi all,

I have a layout to share today using the First Edition 'Wild Flower' paper pad by Trimcraft and a picture of the lone (poor thing) peacock that resides at a local garden centre I visit a lot with my parents (what can I say, they do fantastic breakfasts!)


  1. Print your photograph at 3x4".
  2. Cut 5 3x4" pieces from patterned paper. Arrange with the photo onto a larger piece of patterned paper so they are equal distance apart, stick down and cut around the hole thing, leaving a small border. 
  3. Add some embellishments like doilies and tags on top of the cards.
  4. (Optional) Stitch around some edges of the little cards in co-ordinating colours.
  5. Using 3D Pearl Effects, add dots around the edge of the papers.
  6. Stick the whole thing onto a 12x12" sheet of patterned paper.
  7. Finish with journalling, gems, die cuts and a peacock feather.
Thanks for stopping by!
Emily xx

Saturday, 10 June 2017

Suits You! || Scrapbook Layout || Pink Paislee 'Moonstruck'

Hi all,

I have a layout to share today using the Pink Paislee 'Moonstruck' collection. It was made for a National Scrapbook Day challenge (yep, I completed 12 of them!) and the challenge was to use leftovers - so what I used here was what was left over of my November Like For Ever kit. 


The picture is of my super handsome boyfriend taking his first changing room selfie... The purpose being that he was trying on a suit and wanted to show me what it looked like. It was student night at our local shopping centre so he took the opportunity to get a nice suit with a discount. I felt very proud. I enquired for permission to scrapbook the picture and to my delight, permission was granted. Oooh.

Thanks for stopping by!
Emily xx


Tuesday, 6 June 2017

Spring Blossom || Scrapbook Layout || First Edition 'Sweet Nothings'

Hi all,

I have a layout to share today that I created for a challenge on National Scrapbook Day. The challenge was to scraplift a layout by one of the UK Scrap Addicts team, so I chose to scraplift this one (< link) by Maria La Chica.
This layout uses the First Edition 'Sweet Nothings' paper pad by Trimcraft, and a picture of the stunning blossom trees I saw in a garden in our village.

Thanks for stopping by!
Emily xx

Saturday, 3 June 2017

Right Now || Scrapbook Layout

Hi all,

I have another layout to share today that I made for a National Scrapbook Day challenge. This one was to document a selfie/your life 'right now'. 
I chose to use this pic of me and Nathan before a date night, I was happy because I had my twirly new dress on and I felt so good!


I've had this gorgeous foiled paper in my stash for a while (Can't remember what collection it's from, though!) I also had these beautiful chipboard stickers by My Mind's Eye that perfectly matched the olive green of my dress. I finished it off with lots of gold embellishments.

Thanks for stopping by!
Emily xx