.

.

.

.

Saturday 30 January 2016

Stamped Scrapbook Layouts

Hi everyone

Today I'm going to share some scrapbook layouts I made as samples for Docrafts to be shown on the Home Shopping Network in the US  to promote their new 'Creativity Essentials' stamp sets. Exciting stuff!

This first one uses the 'Floral Icons' stamp set, as well as a stamp from the 'Inspirational Sentiments' and title using the folk alphabet.. First I sprayed a small area at the top and a larger area at the bottom with lime green ink and stamped the floral icons on top in purple. I've found the stamps don't stamp as well if you put a few on the clear block to stamp all at once... Oh well!
The photo and sentiment have been layered on Gorjuss paper.
The background is Nature's Gallery, which looks distressed anyway but then I wanted to accentuate this so I added purple paint. Finished off with little butterflies and gems.


The second layout uses the 'Steampunk Icons' set as a background. (Anything to avoid fussy cutting...). I arranged the stamps face down on the page, and the full set took about half the page. I pressed my clear block onto the stamps to pick them up and stamped once in the top left, and then again where the design finished in the middle.
The papers are Gorjuss, as are the embellishments. The colour scheme went so well with the picture I used. 


Thanks for stopping by!
Emily xx

Thursday 28 January 2016

My Travel Journal

Hi all,

As part of my Docrafts PDT Kit this time I was sent an A5 scrapbook kit. In it you get a scrapbook with printed pages, some stickers, memory pockets and paperclips. With my pages I'm also using other products from the Geometric Neon collection.

Two challenges presented themselves when I got around to doing something with this little book.
1) What am I going to use it for? My usual scrapbooks are 12x12 and are chronological, I make the layouts a few days after I take the pictures. I didn't want to disrupt that routine. But also I didn't want it full of just random things. I wanted a theme.

2) Small layout. When I only really do 12x12", downscaling proves rather tricky!

So, to Pinterest I went. Art journals, smashbooks.
I came up with the idea of a travel journal. Now I can drive, Nathan and I came up with a list of possible places we can go, with ideas for an afternoon out, a whole day, or a few nights somewhere a little further afield. I take so many pictures when we go out that they can't all be used in my main scrapbook. So this book can be filled with instagram shots of the places we go, what we do, just little things like that.

So here's my cover. I was lucky enough to win a set of Alphabet dies from the Papermania Wedding Ever After collection and they are the perfect size for titles in this little book.


Here's the first page inside, with our list of ideas and a picture of us, and of course my beloved Nancy. I normally don't like cutting around things in pictures but for this scale it really works as then it can fit around the text a bit more. 


I think with small scrapbooks you have to not over think it. All you really need is a couple of embellishments. But that's difficult to get your head around when you're used to the larger stuff.
I think these smaller books might be great for card makers who want to dabble in scrapbooking, or just new crafters in general.

The last page I have to share today is an instagram shot of some CDs Nathan and I bought from HMV to play in the car.


I kinda wish I had a Polaroid camera so I could scrap when we go away to places so I could just take the book and some embellishments and stick the pictures in there and then...
But the paper that goes in Polaroid cameras is so expensive... so maybe not! 


Anyway, stay tuned for me sharing updates from my book!

Emily xx

Saturday 23 January 2016

Geometric Neon Shadow Box (Step By Step)

Hi all,

I'm back with a new project made with the new Docrafts Geometric Neon collection - a 12x12" shadow box. The shadow box is great for either using as a decorative display piece or to store your craft stash.
 The shadow box came with my November/December PDT kit and I had been saving it specifically to use with the Neon collection.


Here's how to make it:
You will need:
Shadow Box (they're available in 12x12", 8x8" and 6x6")
2 sheets of deco paper
PVA glue
Acrylic paint in 3 colours
Patterned paper pack

1.       Before you remove the little boxes from the main tray of the shadow box , photograph the layout so you remember where each one goes when you put them back in.
2.       Paint the inside sides of each of the interior boxes with acrylic paint. Make sure to paint the rim of the boxes too as this will show when the box is displayed. Lighter colours may need several coats to show up well.
3.       Measure the bottom of each of the boxes and cut rectangles of Neon paper to fit. Secure in each box with double sided tape.
4.       For the lid, take a deco sheet, cut in half along the length and then half again - each strip is enough to cover a side of the lid.
5.       Paint PVA glue along each side and stick down the deco strips, leaving a little at each edge to tuck under, and secure this with a little more PVA glue.
6.       For the edges of the main tray, cut up another deco sheet the same way and glue a strip along each side.
7.       Leave to dry, then arrange the little boxes in the main tray.
8.       Put the lid back on and fill with your supplies. 


Thanks for stopping by and I hope I've inspired you to make your own!
(And stay tuned as I've another shadow box to share in a few weeks!)
Emily xx


Tuesday 19 January 2016

Craft Room Tour! & Storage Tips.

Hi all,

(This post originated as a video but I didn't like it, so...)

I know storage can be a problem for crafters, particularly if you don't have a spare room.
The room I work in now used to be the computer room, but since everybody's got a laptop now, the computer went. Leaving a room spare. So my parents got me a new desk and the rest is history.
I used to work on the desk in my bedroom, which was fine until I accumulated too many supplies to fit!
I actually don't have that much stuff even now, I only buy what I really need and anything I don't want any more goes on eBay.

 That's my first tip - Get rid of anything you're not going to use. 
Have a huge clear out. Be ruthless. Open an eBay account. Put together bundles of embellishments and people will buy them. Same with die sets, stamps, anything. So long as you're honest about the condition and don't sell anything you would put in the bin, you'll be fine. Then you can spend the money on things you actually want.

So here's my craft space. It's in the box room and the box top is reserved for eBay packing.
My craft room is generally clutter free. I can't stand any type of clutter. It makes me feel frustrated.
Anyway...
My desk area:

My laptop also lives on my desk, for procrastination purposes... and also because I sit in here to do uni work, write ups, blogging, research, etc. Also my mouse is wireless so it doesn't get in my way.

Which brings me to another Tip - Get an extension lead and have it level with your desk.
You can't see it on here, it's behind my laptop. But it is screwed to the wall and has four sockets so my laptop can be plugged in, as well as a glue gun, hairdryer (I still haven't gotten around to buying a heat gun...) etc. Saves you fumbling around behind the desk, knocking things over and getting generally annoyed.

Also you can see the bin under my desk. But when I'm making something, I put all my rubbish in a little plastic box and then tip it into the bin when I'm done. Saves aiming for the bin and things falling past the bin onto the floor and the frustration when you have to bend down to pick it up.

Other bits and bobs on a bookshelf.


The printer lives on the box-top and on top of that is where I put my layouts that need to be stuck in a scrapbook to keep them from getting damaged.

I like to keep my most recent products to hand to make things with. 

Here's my folder with my latest Quirky Kit inside.


Then I have a toolbox with the smaller items of my latest Docraft PDT Kit, and a magazine file with the larger items in.


Then when I get newer products, the older things get put away. 

I keep my embellishments in these little pots I got from Sainsbury's. They do lots of different sizes and the smaller ones are great for die cuts packs, wood & chipboard, tags etc. They used to be labelled but as I bought more boxes and switched things round, the labels are probably wrong. I should probably redo them... Also on this shelf I keep glue, stationery and other bits.


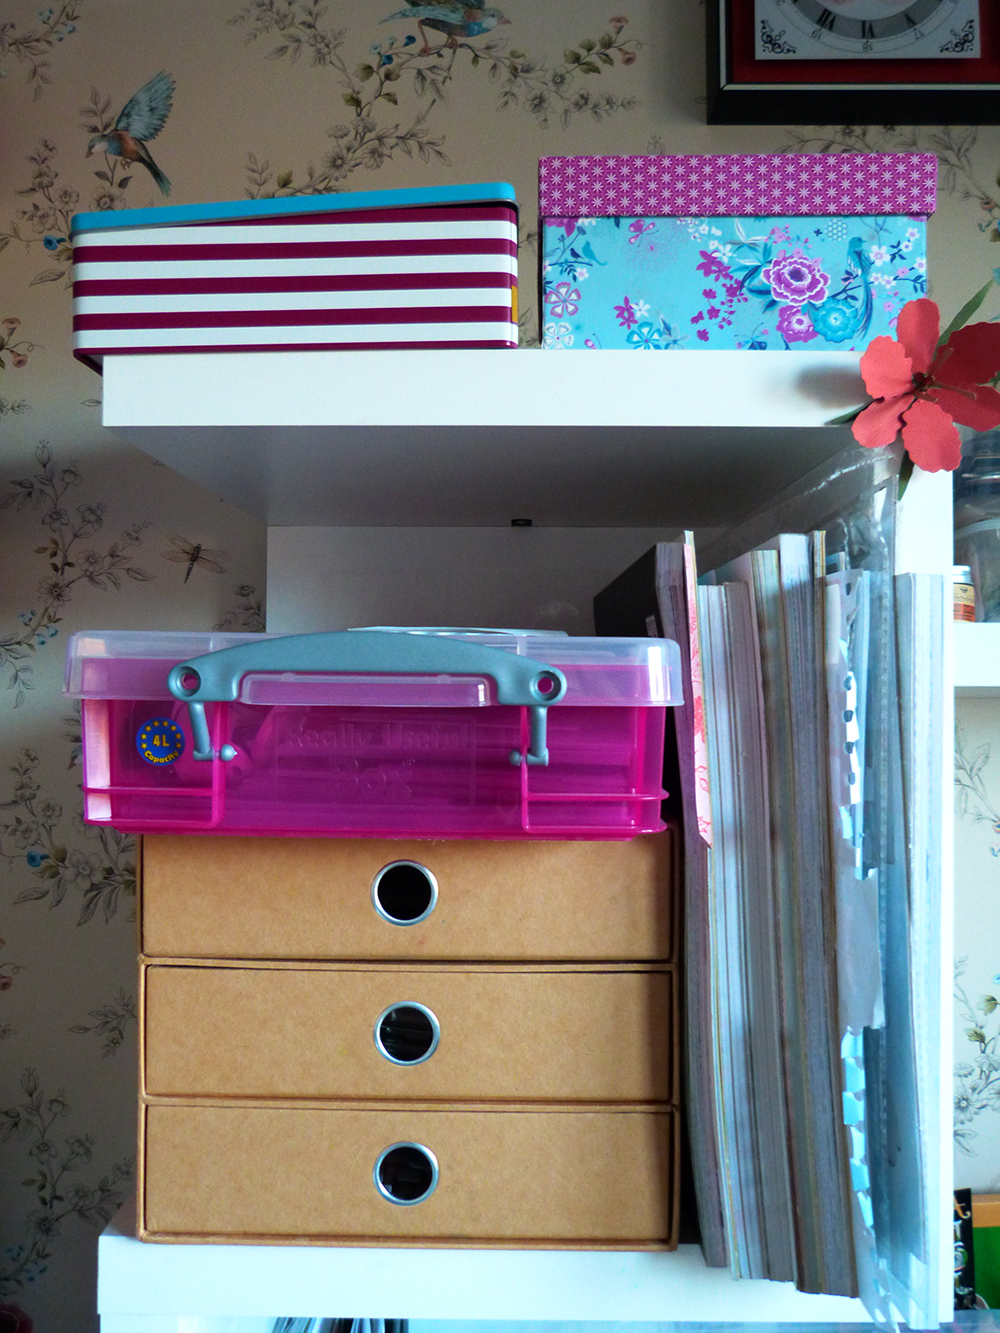
Then on the little shelves on my desk I keep my scrapbook pads and 12x12 chipboard sheets. There's some drawers where I keep dies (one for Xcut, one for Sizzix) and the bottom one for borders and trims. In the pink 'Really Useful' box are my embossing folders and border punches...


Tip - Go down to your local boot sale
At the one at the Keepmoat Stadium on a Sunday there's a stall where they sell Really Useful Boxes dirt cheap. Don't be wasting your money at Staples. 

Up top I've a box filled with washi tape and another with 6x6" paper pads.


Really Useful Boxes come in a variety of sizes and they do a 12x12" for scrapbook paper. This one has all my loose sheets inside. 


Another box tip - TKMaxx do gorgeous boxes. This one has all my stamps and some ink pads in.


Then all my mini ink pads live in another Sainsbury's kitchen box.


Little box with compartments for my little bits.


Old wine box upcycled to store my stickers/flowers.


Tray with all my inks, paints, tapes, pens.


Set of drawers decorated with deco papers. In here is my glitter, sequins, buttons and twine. And some star boxes on top that I don't know what to do with just yet. Also next to it is a notebook where I write all my ideas and a calender where I schedule my blog and deadlines and the like.


To my bookshelf. More magazine files. On the top shelf is what we're selling on eBay.
Second is my coloured cardstock, more plastic boxes with larger embellishments like frames and journalling cards. In the magazine files are stamps, deco papers, stencils.


 Then on the shelf below are my scrapbooks - my new one for 2016, one that I keep my 'miscellaneous' layouts in, and my 2015 book. Then I've display books/expander files. One with A4 papers, one with smaller full sheets of paper, one with off cuts that are still usable, one with alphabets and decoupage sheets and one with pictures I never got around to scrapping, things I have for sale on etsy, and other things I've made and don't know what to do with. Then I have a 5 year journal, a new notebook for when my current one gets full, and all my magazines. I regularly try and get rid of magazines I'm not bothered about any more because they take up too much space. I kept all my issues of Scrapbook Magazine but anything else I get rid of unless I really like it or I'm in it.


Below that shelf is all mine and my mum's sewing things, plus stationery, all sorts really.

Last thing... I seem to have missed out my die cutting machines. I have a Big Shot and Xcut Xpress. I'm currently debating which one is best so my Big Shot is on a coffee table type thing near the door and my Xpress is folded up on a shelf because I got annoyed with it for destroying my A4 embossing folders.

So, that's my craft room. I hope you like it and that I've given you some ideas for your craft space!

Emily xx

Saturday 16 January 2016

Selfies of 2015 layout

Hi all,

A bit late in making and posting this but here's a layout I made using selfies Nathan and I took in 2015. I could have done one of those 'year in review' things but in all honesty I find them a bit cheesy!
I was going to do a little card for each one and stick them all on a layout. But I thought that might look too uniform (and the colours might not have matched up), so I stopped overthinking it, laid my pictures out on some paper with a small pattern on it (Pink Paislee Cedar Lane), and a few choice embellishments in black, with a hint of pink, blue and green like in my pictures. I did have a big Project Life card in the top but it just looked a bit odd so I took it off, I think the empty space works on this layout.


Thanks for stopping by!
Emily xx


Wednesday 13 January 2016

Star Wars BB-8 Shopping Bag

Hi all

Something a bit different this time around!

My boyfriend likes Star Wars. He went to see the new film at a midnight screening when it came out.
I have not seen it, or any of them. But, I have seen BB-8 and it is cute.
When we go to the shop, Nathan will use my bright pink Hello Kitty bag. Not very manly, really!
So I ordered some canvas bags from eBay (£2.85 for 3, not bad) and the new Docrafts fabric paints.
Then I found a picture of BB-8 and copied it onto A3 paper, using a compass for the circles.
I cut the design out, drew around it on the bag, then cut the internal bits out and drew around those until I had my design onto the bag.
Then (IMPORTANT) put a cutting mat inside the bag so the paint doesn't go through to the other side. Or some thick card if you don't have a cutting mat.
Then I painted each part, then black around the edge, feathering it at the edges.
Then the paints say to leave for six hours, turn inside out and iron.


And here's Nathan modelling it.


Thanks for stopping by!
Emily xx


Sunday 10 January 2016

More Than Words Challenge January 2016

Hi all,

I've been busy today making my entry for the first ever More Than Words Challenge.
This month's theme is 'Personality & Selfie'


You can find out more about the challenge here 

Here's my layout.


Yesterday I ended up with lots of new supplies - I found a My Mind's Eye 'Jubilee' kit in TKMaxx, and my sale hoard arrived from Crafty Templates - a box of papers and embellishments. Most of this layout uses those products. 
When coming up with ideas for this layout I was drawn to the Simple Stories 'I Am' sticker sheet. 'I am' fitted the theme of this challenge perfectly!
The subtle colours on the background as made by scribbling watercolour pens onto an acrylic block and picking it up with a brush with a little water, and painting it onto the page.
Then I included some vellum in the shape of paint strokes. 

Thanks for stopping by and I hope you'll play along too
Emily xx

Saturday 9 January 2016

Hello 2016 Layout

Hi all,

I spent New Year with Nathan and our dear friend Sam, who had come down for Christmas (he's at uni in Newcastle).
I have made a layout with the many selfies I took using the November/December Embellishment Quirky Kit. The paper is Maggie Holmes 'Shine' and I believe it's called Dazzle. It's an extra with the Quirky Kit - I had been saving it but then I realised the pictures match the paper and it looked fab!


Thanks for stopping by!
Emily xx

Wednesday 6 January 2016

Geometric Neon Layout

Hi all

Stopping by to share a project I made for the Docrafts Trade Catalogue, using the new Geometric Neon collection, out now!

It's by far my favourite collection yet, pastels with a pop of neon and sophisticated foil detail.


Aaand here it is on the Docrafts Social Media accounts...  They added the journalling for me, as I'm rubbish at it and they like to include it otherwise people complain, apparently. Love seeing my work on their social media accounts for thousands of people to see!

And in the catalogue that comes with Creativity! magazine.


Edit: It's even in the front pages of Creativity magazine! Lovely surprise (though it would be nice to have my name on there somewhere...!)


Sorry to be all excitable in this post but I really enjoyed making the layout and I'm so glad docrafts liked it enough to use it in lots of their promo stuff. :)

Now, I've a shadow box to finish, a shopping bag to paint, a commission to do and a layout to finish. Plus I need to do a layout for the new 'More Than Words' challenge.
And then I've lots of other layout ideas, and other things for the Docrafts PDT. I hope the rest of 2016 is as productive!


Thanks for stopping by!
Emily xx


Monday 4 January 2016

A New Year and a New PDT Kit!

Hi all,

Just a quick post with some thoughts.

I'm feeling pretty good right now (well, apart from going back to uni in two weeks....nothing I utterly despise more but I'm too far in to quit...) Wish I could craft for a living but I think I've a way to go yet...!

My goals this year are to - blog more and better. Make more projects instead of procrastinating so much. Make more videos, of a wider variety than just timelapses. Get onto more design teams (that's more of a work in progress - there's so many super talented people out there and I simply cannot compete!) Also I want to sort my social media out. No more whinging on Twitter!... (Still debating on whether or not to keep Tumblr...). I want to get more followers on Facebook. And to sort this blog out because I still for the life of me cannot figure out how to change the bio on my page. Hmmm.

I also want to take more photographs - easy as now I can drive there's so many places on our 'to-visit' list that we can actually go to instead of complaining how expensive trains are. Can't wait to finish uni in April, then we've got 5 months off til final year. Nathan will be 21 and then it'll be our 6 year anniversary and then I'll be 22... so there's lot of breaks to plan. I want to go to Chester to see the Red Pandas, and Scotland was an idea too. And I want to take Nathan to Whitby, it's a very special place for our family so I can't wait to share it with him. And I want to go rockpooling at Robin Hood's Bay.

....Oh...!

I never shared my Design Team Kit from Docrafts...

Here it is. I ADORE the new Geometric Capsule Collections. So much so that I went online and ordered more! (Now to spend the next week waiting for the postman...)


Now, stay tuned as on Wednesday I'm going to be sharing a project I made for the latest Docrafts Trade Catalogue using the new collection (which also made it into the magazine too!)

Thanks for stopping by!
Emily xx

Saturday 2 January 2016

Driving Test Layout (Using November/December Quirky Kit)

Hi all (and a very Happy New Year!)

I took a cheeky break from a commission I'm on with (there is such a thing as too much stamping...!) to do something for myself.

In December my first Quirky Kit arrived. I did a blog post about what was in it here. But, with one thing and another I never got around to making a full layout using it.

But now, I thought I'd make something using a picture my driving instructor took of me with her car when I passed my test a couple of weeks ago, along with a little note my dad left for me on the day of my test.


My favourite thing about the kit was the colour scheme so I picked some papers from my stash that matched... plus my last sheet of paper with Minis on...

Right, on with my last commission piece... 
Until next time...!
Emily xx