.

.

.

.

Saturday 30 July 2016

Birthday Dinos Scrapbook Layout

Hi all,

Another make using the Birthday Dinos paper pack by StickerKitten today.

I decided to make a layout to show that the paper pack doesn't have to be just used for cards.


Not gonna lie, I'm regretting the red washi tape.... It just makes the green look weird!

Anyway, I used a picture from a recent visit to Chester Zoo. They have an animatronic dinosaur exhibition on right now and, well, you know how much I love dinosaurs. Here I am with a Giganotosaurus, looking a weeny bit miffed because folk kept walking in front of the camera while Nathan was trying to take my picture... rude!

Anyway, I chose the papers from the pack that weren't birthday themed and I was still left with a variety of different sheets. I cut some up and inked the edges and layered them together, with a full size sheet of the green star print paper in the centre. 
I fussy cut some bunting, some of the zigzag paper and some little dinosaurs too.

Once I had finished, I went around the edge of the green paper with my sewing machine. 
The dinosaur is a label that I had kept that came on the dinosaur dress I'm wearing in the picture. 


The sewing machine even goes through Thickers!  I didn't think it would but I carefully gave it a go. It's definitely something I'm going to do on other layouts too.
The border on the page is washi tape and again I went around with the sewing machine.

Thanks for stopping by!
Emily xx


Thursday 28 July 2016

Steampunk Cards using Santoro Willow

Hi all,

Some steampunk cards to share today. 

I made these using the Santoro Willow collection by Trimcraft. I found the collection in The Works really cheap so I bought pretty much everything... these have been on my 'to make' list for a while now and finally I got around to making them and I am so pleased with them. It seems that the best cards are make are always the ones where the images are copyrighted so I can't sell them, which is a shame.

My favourite thing about the collection is actually the packaging... the toppers on both cards are packaging and they are stunning. It's a shame they didn't bring out a few sheets of these toppers or some decoupage - if they exist I haven't seen them and I've run out of packaging now! 

Both cards feature lots of layered papers from the A4 paper pack. I went around the edges of each rectangle with my craft knife to roughen them up and then went around with a brown ink pad to give a more vintage feel. 

On this first one I used glitter glue on the character's dress and some more little dots down the side. It's finished off with some lace, a wooden heart and a metal key. The topper is so beautiful it doesn't need that much else for the card to look stunning. 


This next card has more of a nature theme. I loved the topper but it took up too much space on the card so I cut off one of the trees... the cut off part just fit behind one of the layers of paper so I'm glad I chopped it up. The A4 paper pack came with a sheet of little bits and bobs to cut out so I cut out a heart and a red flower - the red of the flower with the girl's hair and the fox bring the card together.


I photographed these in front of my bedroom wall - the paper is from B&Q and it's metallic - brilliant for photographing any steampunk projects in front of.

Thanks for stopping by!
Emily xx

Tuesday 26 July 2016

First Go At Project Life!

Hi all,

A new video to share today - I won some pocket scrapbooking goodies and I finally worked out what my album would be about - here I am playing around with it for the first time.


Here's a better look at the pages I made. I did end up adding a couple extra embellishments at the end.


Thanks for stopping by!
Emily xx

Saturday 23 July 2016

Die Cut Layout Using Belle & Boo

Hi all,
A smaller layout to share today using the Belle & Boo collection by Trimcraft. They actually shared this on their Facebook page the other day and it made me super happy :)

I've seen a lot of layouts like this on Pinterest, with shapes die cut from the background paper and patterned paper placed behind. Problem is, they are all 12x12 and most people including myself can't afford a large die cutting machine. Oh, how I'd love a Cameo! 
However, there's no reason why it can't be done on a smaller layout. 

The back of the layout looks like this. I cut my paper to 8x8" and using my trusty compass (literally the only thing I took from GCSE Maths!) I drew a circle around the outside, measured the depth of the largest of the Xcut mini hearts dies, then drew a smaller circle just smaller than this... this is getting hard to explain, you're probably best looking at the picture below... I then die cut hearts all the way around and used a smaller heart die to cut smaller ones in the centre. It helps to stick the die down with a little masking tape to stop it moving around in your machine. Make sure the side with the lines on it is on the back of your layout, unless you fancy a lot of rubbing out....

Then stick patterned paper behind the apertures.

You can use a small photo on the layout but instead I wanted to use some of the Belle & Boo decoupage. It's so pretty! 

Thanks for stopping by!
Emily xx


Friday 22 July 2016

Project Life Problems + New Stash

Good evening friends,

Having a bit of a dilemma!

I won a competition a couple months back and received a 6x8" Simple Stories binder and other pocket journal goodies.

I was going to do the album about my holiday but now I seem to have already scrapped a lot of the pictures so it doesn't seem worth it to scrap them again.

Today I was in TKMaxx and I got this little haul. Recently I haven't seen many craft supplies at all in there but today they had so much to choose from, so I chose a My Mind's Eye vellum/paper and stickers pack, Simple Stories clear stickers and a pocket journalling kit, in determination to get this album going.


But I still don't know what pictures to use!
But now it's easier now that everything will match with the pocket journalling kit I got today, rather than sorting through bits and bobs from other card sets. 

Anyway, have a fun weekend, I have a new post to share tomorrow! Got family coming round tomorrow so it should be fun. :)

Emily xx

Thursday 21 July 2016

Pineapple Tri-Fold Cards!

Hi all,

I was in serious need of inspiration last week so I went to the supermarket all by myself to buy a magazine. (Big step for me! Anxiety really is the b-word). I chose Papercraft Essentials, you may already know that I only buy a magazine if I like the free gift (because magazine content is always a bit hit-and-miss) and I'd had my eye on this one - pineapple stamps, dies and an embossing folder. I'm always on the lookout for something a bit different so this was perfect (the mag isn't that bad either. A bit die-cutting heavy for a magazine that has a sister publication called 'Die Cutting Essentials', but I digress.... )

Here's the cards I made and I'll explain a bit more about them below the picture.


For both cards I used the 'handwritten celebrate' dies by Sizzix. I LOVE them!
The card are made from single sheets of A4 cardstock with lines scored 9.9mm from either side and then a diagonal cut. On each I added washi tape to the top, I like how it leads the eye down the card.

I used a black and gold theme for this card, I think the papers are from a Forever Friends collection by Docrafts that came out last year. The front part of the card is heat embossed. I would like a decent embossing ink though, the docrafts ink pads aren't very good (putting it mildly). The mini ones are better but still not perfect. 


This one is my favourite - I finally managed to get my hands on the First Edition Paradise Crush paper pad! For some reason I could only find it on one place online, so I pounced, it arrived, and I love it. I fussy cut some of the flowers from the paper pad and added them to the plainer papers. The gold paper is not from the paper pad, I just wanted something in there to break up the patterns a little. 

Thanks for stopping by!
Emily xx


Tuesday 19 July 2016

Peacock Layout Using Resist Techniques

Hi all,

A new layout to share today showing how to make a scrapbook layout using some resist techniques.


I did have a video for this but I wasn't happy with it, so I'll explain the resist techniques I used here.
Firstly I took a white wax crayon and doodled leaves up the page. I then stuck down some peacock outline stickers and went over the whole thing with watercolour. The white of the crayon shows through. I removed the outline stickers and the white of the page behind them shows up brilliantly.

I took a board (packaging from a shirt) and embossed it with an A4 peacock embossing folder. I went over it lightly with Gelatos and rubbed them with my finger to blend them together. The embossed areas stay white.

The feathers are made with dies by Xcut and the ends coloured with a silver Sharpie.


Thanks for stopping by, any questions then leave a comment!
Emily xx


Saturday 16 July 2016

Birthday Dinos!

Hi all,

Some super cute cards to share today using the Birthday Dinos papers by StickerKitten. You can check out the paper pack here!
If you know me at all you'll know that I love dinosaurs and have done since I was little(er!) I have the Walking With Dinosaurs boxset, I have a dress covered in dinosaurs, I love Jurassic World and not just because of Chris Pratt.... Huge natural history nerd right here. Love it. So when I was offered the chance to have a play with this pack I was super excited! Here's the cards I made.


The pack is 6x6" and printed onto quality 160gsm paper. The paper has a subtle sheen to it which is really nice and the paper is super smooth. There are 30 sheets of 10 designs in the pack. There are some papers with a simple pattern on that you can use for backgrounds and then some with dinosaurs and birthday bits on that you can fussy cut out or use as backing paper. I love papers that have bits you can cut out, it saves you buying extra embellishments are everything you need is already in the paper pack. There are so many options!


This first one uses balloon paper on the background, and a strip across the middle. I fussy cut the little dinosaurs and stuck them on and finally added a die cut sentiment. Simple but super cute!


This is a 4x4" card. I couldn't take how cute the little T-Rex is so I had to cut him out and have him holding onto some huge balloons! 


And finally this one with 4 of the papers layered up, some fussy cut bunting and some die cutting.

Thanks for stopping by and thank you to Sarah for letting me play with her gorgeous paper pack!
I'm planning a scrapbook layout with these papers too, so stay tuned!

Emily xx


Thursday 14 July 2016

Layout Using the May/June Quirky Kit

Hi all,

A new layout to share today, using the May/June Quirky Kit, the sewing machine, and papers from the gorgeous Paradise Crush paper pad by Trimcraft. The picture is one of my last to scrap from our trip to Spain.

With the Quirky Kits I always end up using bits in all my layouts but for this I challenged myself to use the embellishments in the kit and nothing else - I succeeded apart from the blue peg.

I couldn't think of a title so I just did some journalling. I'm trying to do more journalling to tell more of a story, but it's harder than it looks, most of all remembering what we did on what day. I ought to work on my handwriting.... when I was little it was so bad they didn't let me write with a pen so instead I stole someone else's...!

Thanks for stopping by!
Emily xx

Tuesday 12 July 2016

Stitch 'N' Scrap!

Hey everyone,

A little step by step tutorial to share today on how to use stitching in your layouts.
Don’t worry if you don’t have a sewing machine, you can use a needle and thread, it will just take a little longer.
Here's the layout I made (using the 'Felicity' collection by Pinkfresh Studio)


To start with I cut two centimetres off the top and a side of a sheet of white cardstock so I can mount it onto a sheet of 12x12” later on.
I then measured an inch from the edge of the paper as a guide for my stitching. I selected colours I wanted and set up my sewing machine. 
With each colour, go around the square. The line you drew is only a guide, it looks better if you wave the stitching a little, that way all the colours show up.
Now spatter inks over the paper.
I die cut some hearts for a layout I made last week and I have some left over so I stitched them onto paper.
For this layout I cut 4x4” squares from patterned paper. To save paper though, for the bits that are behind, I cut a minimal amount as this wouldn’t be seen.
The picture I’m using is of Nathan and me at Chester Zoo, I set my camera up on the timer on a sculpture and then ran to join Nathan... I figured it was a nice change from taking selfies all the time.
I added some washi stickers and ephemera...
and finally stuck the layout onto patterned paper, from the ‘Shine’ pad by Maggie Holmes.

Thanks for stopping by!
Emily xx

Monday 11 July 2016

Tag A Friend Blog Hop

IHi all,

My friends and I made some tags to swap this week.

Here's what Michelle sent me:


And here's what I sent to her. I drew a skull and filled it with zentangle patterns, printed it out small and stuck onto the tag.


Don't forget to hop around and see what we all sent and received!

Michelle

Katie

Mags

Heather

Amy

Thanks for stopping by!
Emily xx


Saturday 9 July 2016

Feather Cards

Hey everyone,

I've noticed I've been posting a lot of layouts lately... I've had a lots of inspiration and pictures to scrap. I do have some cards that I haven't yet shared that I love, so here they are as a nice change from a million selfies of myself and my too-handsome-for-me boyfriend...!

I've been making some cards with the new Xcut feather dies from docrafts.

I'm not the biggest fan of filigree dies, I think they're overdone and a liiiittle bit silly (tractors? football boots? Really....?) but I love feathers so I had to get these when they came out.

They're a good size but do take a few runs through the die cutting machine which is rather annoying...

I made these using the First Edition Kaleidoscope paper pack by Trimcraft.. I had my eye on it for a long time and then my friend was having a clearout so she kindly sent it to me. :)

On this first one I used my gold Sharpie on the ends of the feathers. (Seriously, if there's one thing you need in your stash it's metallic Sharpies).


And a CAS card. 
I put the dies inside the gate-fold and ran through my machine, I then die cut the feathers (through the reverse of the paper, so the pattern side up fit). I secured with little bits of regular sticky tape.
CAS cards are actually quite difficult, I feel this one is a bit boring, but... maybe that's the point....?


Thanks for stopping by!
Emily xx

Thursday 7 July 2016

Playing With Pinkfresh Studio 'Felicity'

Hi all,

Apologies for my absence, I was in Chester with Nathan for our anniversary.
We stayed at Cheshire Oaks, we like to stay somewhere where there's somewhere to wander around at night.
It took us four hours to get there, on the M62 it said 'long delays' so we kept going... for it to say it was then closed so we had to take a detour between Huddersfield and Oldham... a pretty scary experience, Google Maps was taking us on these roads wide enough for one car, down these massive hills (by that, I mean in first gear with the clutch down and controlling it with the brake... it was still going 20mph!)...but we got there eventually, unscathed!
Anyway, we spent the rest of the day in Chester, then the next day, our anniversary, we spent at the zoo and then went on to see The Secret Life Of Pets (really good!) and had dinner at Wagamama. I had duck for the first time and it was delicious.

Anyway, on to my layout. I used a selfie we took in the hotel once we had got ready for our evening out.


A few weeks ago I saw a bundle of Pinkfresh Studio 'Felicity' goodies on a selling page on facebook, a 6x6 paper pack, washi stickers, ephemera and some little sequins for £10 so I pounced... and kept the set for this layout (and another that I made today - stay tuned!). 

The backing paper is from the September Skies ppad by Heidi Swapp. This layout is mounted onto another sheet of paper but it photographed odd so I cropped it out. 

Thanks for stopping by!
Emily xx

Sunday 3 July 2016

More Than Words Challenge July 2016

Hey everyone,

My mojo has come back and so I thought I'd have a go at another mixed media layout and join in with the More Than Words Challenge.
The picture I used is of me and my mum at Hardraw Force in the Yorkshire Dales. You might recognise it from the film Robin Hood: Prince Of Thieves, where Kevin Costner washes under the waterfall. (Well, that's what my dad says, I wasn't born when the film came out!)


The theme this month is...

I had wanted to scrap this picture anyway, it makes me SMILE because my dad took the picture, of me taking his picture. My mum is laughing at us being silly...
(I also used 'smile' in little letters on the layout... extra points? :P )
I tried to incorporate the sketch as best I could but I wanted the picture nice and big to show the waterfall behind us. 

The background was actually really fun to make. I don't have many stencils so I had to think outside the box to include some sparkle... so I grabbed my bottle of PVA glue and loosely drew big flower shapes on top. I sprinkled the glitter on top and let it dry...
The square clusters are by Things To Alter, it was a pack of two and I cut them both up to make four. I painted them white and tucked them into the layout.

Thanks for stopping by!
Emily xx

Saturday 2 July 2016

Limited Palette Layout

Hi all,

A new process video to share today, showing how to make this layout using a limited palette of monochrome with a pop of yellow.
I normally post these on Tuesdays but I'm going to Chester next week with Nathan for our anniversary so I wouldn't be here to share it.


Thanks for stopping by, any questions then leave a comment! 
Emily xx

Friday 1 July 2016

Inspiration

Evening all,

It's Friday night, there's nothing on tv (read: no Kardashians on a Friday, boo...) but my crafting mojo has taken a walk so instead here I am writing a blog about what I am inspired by.

Firstly - Youtube. I must mention my current favourite crafter, Missy Whidden... She designs for lots of companies/kit clubs, and I love to watch her videos. She's always trying something new, her commentaries are interesting to listen to, I look forward to her new uploads.
Lately I've found myself watching a lot more Youtube. I enjoy process videos but I also like watching people showing their newest hauls. You can see the latest trends and take inspiration from what others are trying. 

New stash always helps. I want new things but I won't get a chance to buy them til later next week so the stores have chance to get new stock in.... as I mentioned before I'm desperate to get my mitts on the Paradise Crush pad by Trimcraft, but I like the look of the Papermania Wilson Wood collection... I say like the look but I can't actually find any decent pictures of the papers yet to order online (docrafts seem to have neglected showcasing their newest products in their magazine...). For some reason, I have so much stash I need to use up but I can't get on with anything new in case I buy new things afterwards that I wish I'd used on that layout!

I like to buy the odd magazine, when there's a free gift with it that I like the look of. If the content of the mag is uninspiring then at least there's a nice gift to play with. But generally there's always something in there to be inspired by.

Participate in challenges. There's always some form of starting point given and they really get you going with an idea. Try More Than Words or Things To Alter.

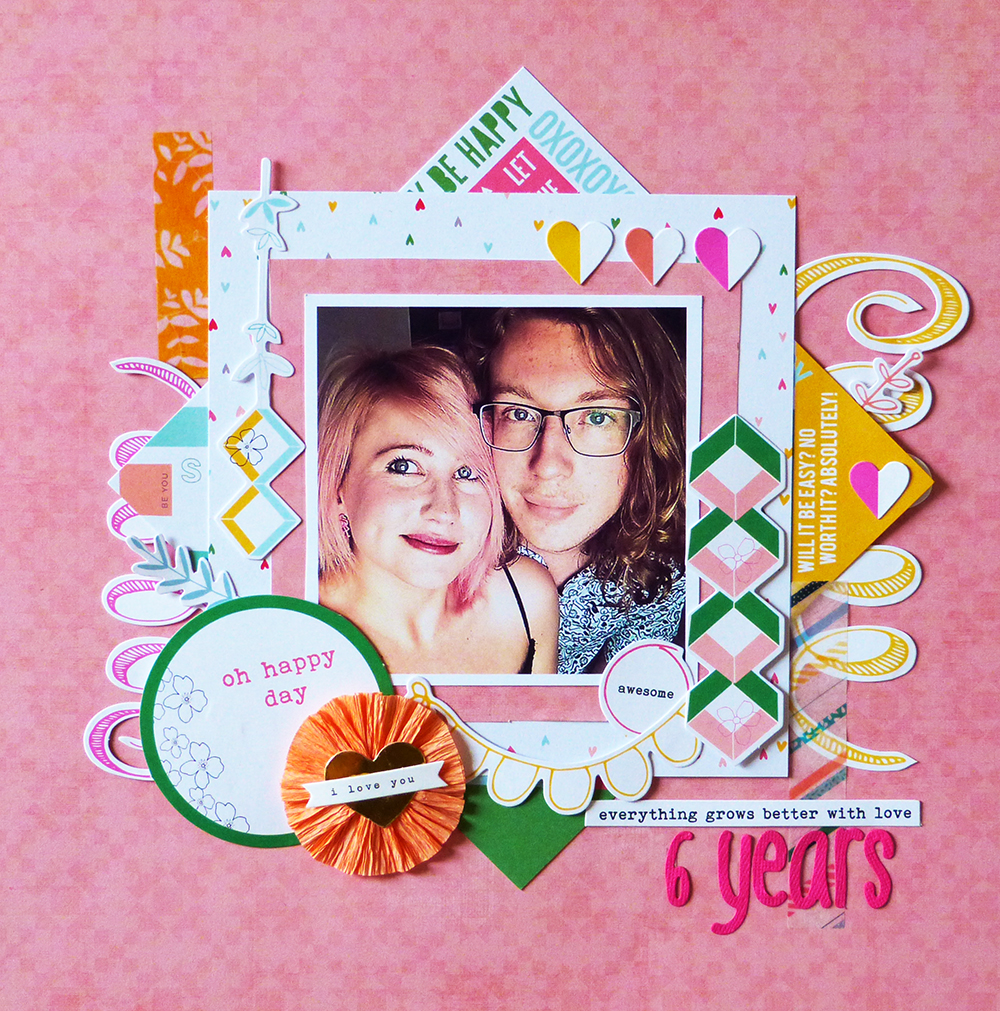
Days out always help me, I love to get new photos to scrap. In fact right now I'm holding off using some Pinkfresh Studio products as I want to use them on an anniversary layout I want to make using a selfie I'll inevitably take with Nathan on Tuesday. Oh man, I'm so excited about our little trip to Chester!...  It doesn't have to be a long trip... just go into town, walk to the shop, sit in the garden... even if you take pictures of flowers or buildings, it can kick start an idea.

Browse your friends' pages. See what they have been making. Have a swap and a blog hop.

Write down all your ideas, no matter how small. Number them. Use this site. Enter in the umber of ideas you have. It'll tell you which one to make. If you don't like that idea, pick again. I do this all the time, I've 30 ideas but right now I don't feel like doing any of them!

Finally, Pinterest. If you're not on there, you're missing out. 

I felt odd writing this as there is so much inspiration out there but sometimes if your mojo is gone, it's gone and you need a few days on with something else and eventually it will come back. I always wind up feeling guilty when I don't make anything and have to resort to my bank of blog posts for something to share... but I know I'll be inspired soon.

Thanks for stopping by!
Emily xx