.

.

.

.

Friday 28 April 2017

Bee-autiful! || How To Make A 9x12" Scrapbook Layout || StickerKitten 'Bee Garden'

Hi all,

I'm back with another layout using the 'Bee Garden' collection from StickerKitten. You can get your hands on the collection HERE.

The picture I used is another from my little bee shoot last summer. I found you need a fast shutter speed to capture the bees well. Will have another go this year!

I'm so into making 9x12" layouts right now. They seem to be easier to work with as there is less space to fill so this is a great thing to have a go at if 12x12" intimidates you, or you don't have as much time to scrapbook.


Step by step;
  1. Cut 1cm off the top and one side of an A4 sheet of white cardstock.
  2. Spray fuchsia ink onto spare plastic packaging, add a little water and press onto the white cardstock and move around until the area you want to cover is covered.
  3. Mount your photo onto patterned paper. Try to alternate plain and patterned.
  4. Cut up hexagon patterned paper and stick around the layout.
  5. Stick the layout onto an A4 sheet of patterned paper.
  6. Stitch around the layered photograph and stick onto the layout.
  7. Stitch around the inside of the white cardstock. 
  8. Add a title and crystal drops to embellish.
Thanks for stopping by!
Emily xx


Thursday 27 April 2017

Simply Creative Chalkboard Cards!

Hi all!

I have a couple of cards to share today using the Simply Creative 'Chalkboard' papers by Trimcraft.
I have to say black and white is never my crafty cup of tea, despite me dressing in black 90% of the time... ha ha! 
I had to drop some colour in there and here is what I came up with. 

This first one uses the new Dovecraft wooden stamps. I stamped them onto squares of white cardstock and added spray ink to each. 


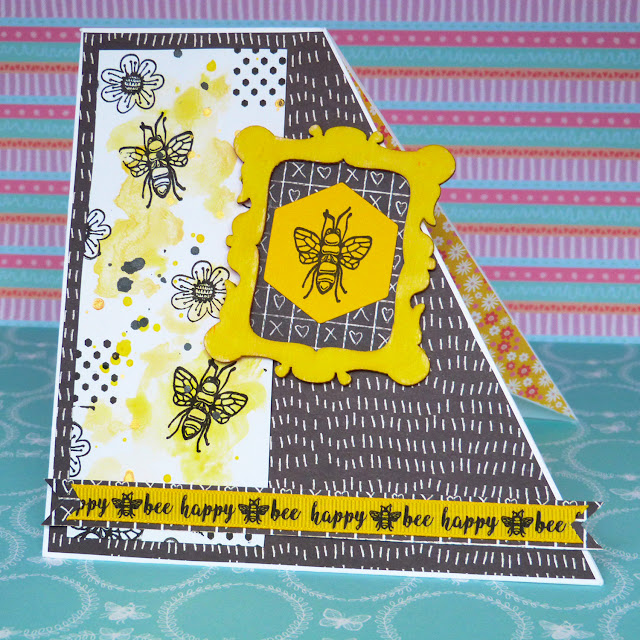
This next one has a pop of yellow. A lot of the Dovecraft ranges have patterned wooden frames but if you flip them over you can paint whatever colour you want onto the other side. 
The mixed media on this card is spatters of yellow watercolour and the stamps are from the Dovecraft 'Blooming Lovely' collection.

Like the look of the fancy folding on this card? You can follow a tutorial HERE.


Thanks for stopping by!

Emily xx

Tuesday 25 April 2017

It's My Party And I'll Make A Wish If I Want To || Scrapbook Layouts || Simply Creative 'Make A Wish'

Hellooooo!

I was super excited last week to receive my new DT kit from Trimcraft. Included was an 8x8" scrapbook covered in lipstick print. I was in love!

I decided to use it for my smaller scrapbook layouts and the first layouts I made were using pictures from my 21st birthday party and the Simply Creative 'Make A Wish' papers.


The smaller size makes this scrapbook perfect for beginners and the funky design will make it a great gift for any young relatives who might enjoy scrapping.


Thanks for stopping by!

Emily xx

Saturday 22 April 2017

You Are The Sunshine In My Soul || Scrapbook Layout || Cocoa Vanilla Studio 'Wild At Heart'

It's Saturdayyy!

Today I have a layout to share using the 'Wild At Heart' collection by Cocoa Vanilla Studio. It took a while for the collection to become available here in the UK and as soon as it arrived I ordered some things from Hey Little Magpie. I got a sheet of the 12x12" paper, the chipboard frames, die cut ephemera and sticker sheet. Cocoa Vanilla is one of my favourite scrapbooking brands, everything is so gorgeous and a pleasure to work with.

The pictures are of a recent 'date night' (read: Nathan really wanted a Wagamama, I am just, and I quote, a "by-product" (when my mother commented that he spoils me)) . I was taking selfies before we set off. This is the first selfies we have taken since Nathan had his hair cut. He brushes up quite well :0). I can't say why I'm laughing in the second picture. I just kept pressing the shutter on my phone.


I chose this paper because I am obsessed with watercolours. Need I say more! I added some of my own behind the picture and embellishments by using the packaging technique. I tried to emulate the colours that were on the paper already. Once dry I grabbed a heart stencil and painted select areas in 'Payne's Gray' (the best watercolour shade!) 

After that, the layout was super simple to make. I stuck the photos onto the large chipboard frames and layered them up with foam tape, then arranged the embellishments around it. 


Right, it's Nathan's birthday today. He's 22 now. Way to make me feel old. (He was 14 when I met him!!). As I write this ((April 1st)) he's not decided what to do for it so hopefully by now we have something planned. If not then we'll probably end up in Wagamama again...! Would have liked to have gone away but the final uni deadline is less than a week away and it wouldn't have been wise to plan anything.

Thanks for stopping by!
Emily xx
Thursday 20 April 2017

Black and Gold || 9x12" Scrapbook Layout || StickerKitten 'Bee Garden'

Hello!

Today I have a layout to share using the Bee Garden collection by StickerKitten. 

Last summer I took lots of pictures of the bees in our garden and they are perfect to use with this collection.
The stamps in the collection are so gorgeous and I just had to try some heat embossing with them.


The stencil is by Prima and I used it with some Nuvo embellishment mousse.


Here's what is in the collection. You can find it HERE.
I'm so in love with the sequins!

Thanks for stopping by!
Emily xx


Tuesday 18 April 2017

Spring Has Sprung || Scrapbook Layout || Dovecraft Blooming Lovely

Hi all,

I have a layout to share today using a photo of the gorgeous flowers in the Museum Gardens in York. I took my boyfriend's new camera and it takes brilliant shots and I love it. I only use my own camera now for project photography. 


I used the Dovecraft 'Blooming Lovely' collection to make this layout and here is a step by step guide:

  1. Stick an 8x8” sheet of patterned paper in the centre of a 12x12” sheet of patterned paper.
  2. Cut a 7” square of vellum and stick in the centre of the 8x8” sheet.
  3. Print a photograph and mount twice.
  4. Cut a wooden frame in half. Stick one half behind the top right of the photograph and stick the other half on the left side of the 8x8” sheet.
  5. Cut  a coloured doily in half. Stick one behind the top right of the photograph and one behind the bottom left.
  6. Cut a length of washi tape just wider than the 8x8” sheet and stick towards the bottom of the 8x8” sheet.
  7. Cut adhesive banners in half and stick on the left and right of the tape.
  8. Add a length of ribbon above the left side of the tape.
  9. Stick down your mounted photograph on the right side of the layout.
  10. Stamp ‘Spring Has Sprung’ onto white cardstock, cut out and stick behind a wooden frame. Fill in the gaps with patterned paper and washi tape. Stick on the bottom left of the photograph.
  11. Add a line of buttons along the still visible parts of the washi tape.  
  12. Add floral stickers, die cut butterflies and flowers to finish off the layout.

Thanks for stopping by!
Emily xx

Saturday 15 April 2017

Mixed Media Scrapbook Layout || First Edition Paradise Crush

Happy Saturday!

I'm back with a new mixed media layout, I think I've finally got my mojo back. This layout is made using the First Edition Paradise Crush paper pad by Trimcraft. If you're one of my American followers then you can now pick up this paper pad (and 'Storyteller') too in Michaels. Funny how we struggle to get our hands on scrap supplies here in the UK, I never think of it being the other way around!

The picture was taken at the BioParc in Fuengirola, Spain. I asked (instructed..) my boyfriend to stand under this huge building so I could take the picture. It's untitled. Not a stylistic decision, I'm afraid, I'm just bad at titles...! 
 Step by step:
1) Take a sheet of coloured, textured cardstock and using an old credit card, paste gesso in the centre of the page. Leave to dry then add a couple more layers, depending on how thick the gesso you're using is.
2) Paint watercolour paint onto plastic packaging and 'smoosh' (press down) on top of the gesso. Repeat on more packaging with co-ordinating colours.
3) Print your photo at 2x3" and mount onto patterned paper.
4) Fussy cut flowers from the paper pad and cut a coloured doily in half.
5) Arrange the cut out items behind the photo in the centre of the page and when you are happy, stick them down.
6) Using a patterned stamp, stamp in co-ordinating colours behind some of the elements of the page.
7) Finish with stickers and adhesive gems.

If you're wondering what watercolours I use, they are by Reeves. I bought them when I was in art school and I still love them. 

Today my family and I are celebrating Christmas. With one thing and another, we never actually had Christmas dinner all together so it will be good to have a catch up with everybody. Fingers crossed no one asks about uni/etc :) :) :)
Thanks for stopping by!
Emily xx

Tuesday 11 April 2017

Mum || Scrapbook Layout || Dovecraft Painted Blooms

Hi all,

I have a scrapbook layout to share today using a picture of my lovely mum.
It was difficult to find a picture of her that went with the pastel floral, posh-ish theme of the layout - we are a rather silly family so most pictures are of mum asleep, with something sticking out of her head, or in one case, in the stocks.... I did however find a nice one from a wedding a couple years ago.

This layout uses the Dovecraft 'Painted Blooms' collection. Here's a step by step. Don't be put off by the machine stitching on here, it's not essential!

  1. Take two 12x12” sheets of patterned paper. Cut one slightly smaller than the other, distress the edges and stick the smaller one on top.
  2. On the left side of the layout, stick a doily and three printed tags. Stick a brad through each hole in the tags.
  3. Stick an 8x8” sheet of patterned paper in the centre of the layout.
  4. (Optional) Use a sewing machine to stitch around the edge of the smaller sheet of 12x12” and the 8x8” sheet in co-ordinating thread.
  5. Die cut ten butterflies from patterned paper.
  6. Make two faint pencil lines on the right hand side of the 8x8” sheet, making 5 marks 1 ½ inches apart on each of the two lines.
  7. Using the sewing machine, manually stitch (by rotating the wheel so you do not go too quickly and mess up!) down the pencil line to the first mark, add the first butterfly and stitch through the centre of it. Keep going until there are five butterflies on each pencil line. You shouldn’t have to rub out the pencil marks as they should all be covered up by stitching.
  8. If you do not have a sewing machine, you could stitch by hand or just stick the butterflies down.
  9. Add an adhesive gem to each butterfly.
  10. Add a photograph on the left of the layout and add a floral paperclip in the top left.
  11. Add floral tape and crochet trim to the bottom of the 8x8” sheet.
  12. Finish with a title, die cut flower and a bow in the top left corner.
Thanks for stopping by!
Emily xx

Saturday 8 April 2017

Arthur's Seat || Scrapbook Layout

Hello hello hello!

I have a new layout to share with you today. The pictures are from when Nathan and I climbed Arthur's Seat on our trip to Edinburgh. 
We originally tried to go up Calton Hill (the smaller hill which was near our hotel) but couldn't work out how to get there so instead we decided upon Arthur's Seat. That's when I took the second picture down. 

Eventually we go top and the views were awesome. 


The backing paper here is from the Shimelle 'Little By Little' collection. I love mixed media but whenever I try to do a background I'm never happy with it and I liked the painted effect on this paper. In the end I cut it in half and flipped one side over as I loved the side with cameras on it too and it added more interest to the background. The papers are simply taped together at the back, you can't really see the join as it is covered with the photographs. This layout was super simple to make but it turned out so well!

Thanks for stopping by!
Emily xx

Tuesday 4 April 2017

Trimcraft Bloggers Day || Scrapbook Layout || Dovecraft Painted Blooms

Hi all,

A layout to share today using pictures and memorabilia from my trip to Trimcraft for their Bloggers Day back in February.

I have included memorabilia from the day - my name tag, the little business card and the tag from my 'goody bag'. I have kept the balloon too (they can be harmful to wildlife) and folded it and put it in one of the pockets in my scrapbook. Never throw things like this away as they look fab on your layouts - I'm talking maps, tickets, leaflets you can cut bits from... anything!

Obviously I had to use Trimcraft products for this layout so I used the Dovecraft 'Blooming Lovely' collection.

  1. Step by step:
  2. Take four sheets of 6x6” patterned paper. Keep once its original size, cut 1 inch off two of the sheets, and 2 inches off the final sheet.
  3. On a 12x12” sheet of patterned paper, stick down the whole 6x6” sheet in the top left.  Stick another sheet below and to the right and the other sheet even more so (but don’t stick this one down too much)
  4. Take the smallest sheet and cut a pennant into one of the short sides.
  5. Print a photograph at 4x4” and stick onto this sheet, then stick onto the layout.
  6. Print another photograph at 2x3” and mount onto patterned paper and then onto a tag. Slide behind the paper you didn’t stick down properly, then stick this paper down so it allows the tag to slide out.
  7. If you have a small memento that you don’t want on full display but still want somewhere on the page, make a pocket. You can do this by cutting patterned paper larger, then folding it around the piece of memorabilia and sticking the pocket down. Add a frame on top and add an embellishment.
  8. Add washi tape and stickers in the bottom right of the layout.
  9. Add a line of bows down the centre of the layout.
  10. Add a title. Use different colours and shapes of letters to add some interest.
  11. Add some journaling.

Thanks for stopping by!
Emily xx

Saturday 1 April 2017

On Top Of The World || Scrapbook Layout || OneCanoeTwo 'Hazelwood'

Happy Saturday!

I'm back with my usual Saturday 'Emily Scraps For Herself'' post. I love making DT projects but it's always nice to make something using products I have treated myself to and this week it's no different.

With one thing and another I'm still in the middle of scrapping my pictures from a visit to Edinburgh in January. The final deadlines at uni are this month and I like to get things out of the way so I've been doing things for that rather than crafting, promising myself and my boyfriend that we can take some time out once it's all finished to have some trips out and find ourselves again before we 'settle down'.

Here is my layout. In Edinburgh Nathan and I climbed Arthur's Seat and took a selfie at the top. You can just see the city behind us. Still can't believe we climbed all the way up there! Obviously I'm silly and left my sunglasses in the hotel. (Least I didn't forget them when we went to the Costa del SOL, eh Nathan?)


For this layout I used the OneCanoeTwo 'Hazelwood' collection from American Crafts. I have almost every item from this collection, I absolutely adore it. This paper really caught my eye, I just love the bright colours. Could I make a layout using something so bright as a backdrop? Of course!

I printed my picture at 2x3" and stuck it behind a frame. I had some bits of a 12x12" vellum sheet by Webster's Pages left, it's kind of adventure themed, I used the map from the sheet and also fussy cut some arrows from it too. The rest of the arrows are fussy cut from the little strip from the bottom of the background paper. I arranged the arrows to point towards my picture. The frames in the bottom right corner are, I think, by Simple Stories. I used one of my train tickets behind one and stamped the date on the other using the Hazelwood date stamp.

The Thickers are 'Fancy Free' by Paige Evans, when I got them I was intimidated by their size but they work so well on this layout as they do not get 'lost' in the backing paper.

I finished off the layout by adding Hazelwood ephemera and stickers and some of the adorable Shimelle 'Go Now Go' heart stickers.

Thanks for stopping by!

Emily xx