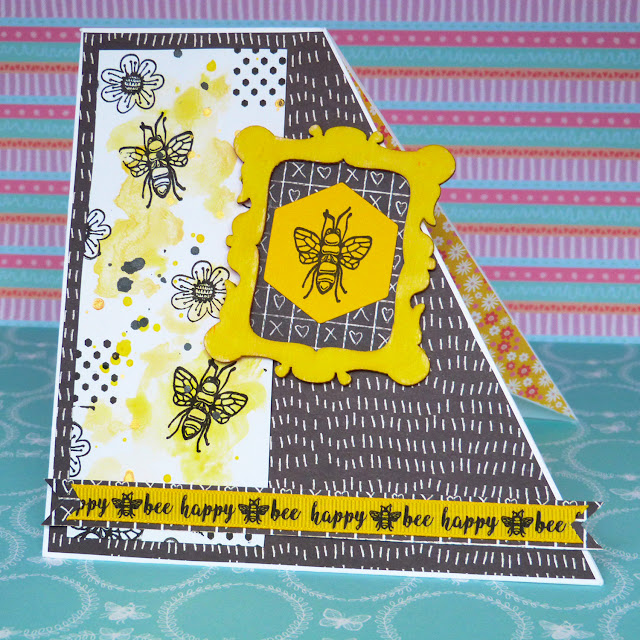
.

.

.

.

Showing posts with label card making. Show all posts

Tuesday, 3 October 2017

5 Projects Using... Simply Creative Enchantment


Here are 5 projects using the Simply Creative 'Enchantment' papers from Trimcraft. There are instructions on how to make them below each picture.


This card is perfect for a little girl! The bows around the wand untie so the wand can be removed and played with. (I wish I knew a little girl to send this to!)

  1. Cut 2 stars from acetate. Stick together with 3D foam tape around most of the edge. 
  2. Through the gap, add sequins. Seal the gap.
  3. Cut a star the same size from patterned paper and cut an aperture in the middle. Stick on top of the shaker element.
  4. Stick to a paper straw. Cut the straw down so the wand will fit on a tall card blank.
  5. Take a tall card blank and cover with patterned paper.
  6. Place the wand onto the card. At the top and bottom of the straw, cut a slit either side using a craft knife.
  7. Thread ribbon through the slits and around the wand and tie in a bow. 
  8. Embellish the rest of the card.

  1. Stamp designs in black ink onto adhesive cork and cut out.
  2. Die cut small doilies and stick the cork onto them.
  3. Cut a strip from 6x6" patterned paper and mount onto another piece and trim, leaving a thin border.
  4. Stick to a 6x6" piece of paper and then onto a card blank.
  5. Cut a doily in half and stick on either side of the strip.
  6. Stick the cork pieces in a diagonal.
  7. Finish with adhesive gems.


  1. Fussy cut houses from patterned paper. Draw around them onto foam and cut out, drawing on the windows.
  2. Add a small piece of tape to each foam piece and attach to a stamping block.
  3. Stamp patterns along a 12x12" page using the foam shapes in black ink.
  4. Fussy cut strips of house and stick below and to one side of the stamped rows using 3D foam.
  5. Print your photo at 3x4" and mount. Add twine behind.
  6. Cut up some film strips and stick behind the layered photo.
  7. Add two pieces of pennant to the top right of the page.
  8. Add a title on the bottom right of the page.


  1. Die cut 6 doughnuts.
  2. Use a ruler to rip strips of patterned paper. Stick two strips to a 12x12" page.
  3. Stick the 6 doughnuts down the page, and add lengths of washi tape and ribbon.
  4. Print your photo at 3x4" and mount with patterned paper and a doily. Stick down.
  5. Die cut your title and stick down.
  6. Finish with an emoji stamp and sequins.


  1. Use a doily die with unicorn print paper. Die cut a larger doily and stick the smaller one on top.
  2. Stick both onto the top left of a large doily. Add a sentiment too.
  3. Stick a die cut tag behind this and add a piece of ribbon through it.
  4. Stick to a 14cm square of patterned paper and then stick to a 6x6" card blank.
  5. Finish with an accordion flower.

Thanks for stopping by!
Emily xx

Thursday, 10 August 2017

Kiss & Makeup Birthday Card!

Hi all,

Just a quick post from me today to share a card I made using the Dovecraft 'Kiss & Makeup' collection from Trimcraft. 

Instructions are below the picture, it might look complicated but it was quite easy to make.


  1. Die cut several hearts from patterned paper, in two different sizes. I did 10 of each. Stick the small on top of the large.
  2. Cut a 14cm square from patterned paper and turn over. Draw across the diagonals to find the middle and pierce.
  3. Cut a circle from scrap paper and pierce the centre of that too, line the holes up and adhere with tack. This will help you get the hearts in a perfect circle.
  4. Arrange the hearts in a circle and stick down with glue.
  5. When the glue is dry(!) go around the circle a few times using a sewing machine.
  6. Mount the square onto coloured cardstock, and then to a square card blank.
Thanks for stopping by!
Emily xx

Tuesday, 8 August 2017

5 Projects Using... Dovecraft Perfectly Pink!

Hi all!

Here are 5 projects using the Dovecraft 'Perfectly Pink' collection from Trimcraft. There's a bit of everything here! There are instructions on how to make them below each picture. 


  1. Add gesso across the centre of a 12x12" sheet of pink cardstock
  2. Once dry, use the packaging technique to smoosh pink spray ink across the gessoed area. 
  3. Take a pack of wooden frames and back each one with patterned paper.
  4. Arrange across the layout and stick down when you are happy with the arrangement.
  5. Print your photo and mount. Cut a doily in half and stick one half behind the photo and the other to the left of the page. Add pegs to the photo and stick down.
  6. Finish with accordion flowers, a title and other embellishments in each frame.


  1. Cut 4 inches off the bottom of a 12x12" sheet of patterned paper. Mount onto a 12x12" sheet of contrasting paper.
  2. Cut a doily in half and stick one bit on the top left and one on the bottom right of the page.
  3. Stick a length of ribbon across the top and bottom over the centre paper.
  4. Fussy cut several flowers from floral paper. Stick some over the doilies.
  5. Print your photo and mount several times onto patterned paper. Add a doily behind and stick to the layout. Add more fussy cut flowers. 
  6. Finish with a title, gems and buttons.


  1. Cut 2 hearts from acetate. Stick together with 3D foam tape around most of the edge. 
  2. Through the gap, add sequins. Seal the gap.
  3. Cut a heart the same size from patterned paper and cut an aperture in the middle. Stick on top of the shaker element.
  4. Die cut a large tag and cover with patterned paper.
  5. Stick the shaker element on top.
  6. Decorate with paper flowers.


  1. Cut rectangles the same size as a  die cutphoto frame, from acetate. Stick a photo frame to one of the acetate pieces. Add 3D foam around each edge and the inside joins in the photo frame.
  2. Add sequins into each compartment. Add the other piece of acetate to the back.
  3. Cover a card blank with patterned paper.
  4. Stick the shaker element in the centre.
  5. Embellish.

  1. Stamp a large sentiment in black ink on a card blank.
  2. Fussy cut flowers from patterned paper. 
  3. Stick the flowers on the card, around the sentiment and so they are overlapping each other and the edge of the card.
  4. Leave to dry and add a couple of small embellishments. 

Thanks for stopping by!
Emily xx

Thursday, 22 June 2017

Lighthouse Father's Day Shaker Card || First Edition Wild Flower

Hi all,

So I know Father's Day has been and gone but I wanted to share the card I made for my dad. I didn't want to blog about it beforehand and ruin the surprise as he is a good one and appreciates handmade cards.

The instructions are below the photo so you can make your own shaker card! The papers I used are from the First Edition Wild Flower paper pad by Trimcraft.


1.       Cut the thick part of a blank photo frame down so that all side are equal.
2.       Cut 2 squares of acetate and 1 of patterned paper the same size as the outside of the photo frame.
3.       Stick thin tape around the edge of one square of acetate, stick the other to it and before you seal it, fill with sequins.
4.       Stick more thin tape around the outside of the pocket and stick to the frame. Stick the square of coloured paper to the back of the pocket.
5.       Die cut a lighthouse from patterned paper and add detail with 3D Pearl Effects. Stick to the frame.
6.       Cut a 13cm square of coloured cardstock and stick to a 13.5cm card blank.
7.       Cut 2 rectangles from patterned paper, one 7x13cm and the other 7x2cm. Stick one on each side of the coloured cardstock.
8.       Stick your shaker pocket on top of the card, in the centre.
9.       Die cut three portholes, stick along the bottom of the card and add ‘dad’ on top of them.
10.   Using the inside of the portholes, stick down the left side of the card and add a small button in the centre of each with a little twine threaded through.

While I'm here, here's another card made using the same collection.


Thanks for stopping by!
Emily xx


Thursday, 1 June 2017

Bee-autiful Cards! || StickerKitten 'Bee Garden'

 Hi all,

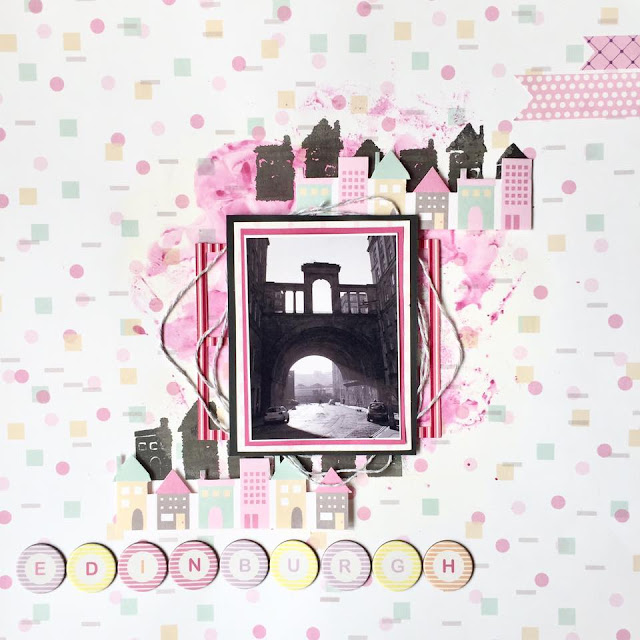
I have some cards to share today using the 'Bee Garden' collection by StickerKitten. At time of posting, Sarah will have been on Hochanda promoting her products and these first two cards are what I sent to her for use on the show, along with two A4 scrapbook layouts. I'm always happy to help out a friend and it's so exciting to make things for the telly!

You can pick up the collection HERE. < (Link)

The Bee Garden paper pad has a mixture of watercolour patterns and also kraft papers with delicate black linework and I tried to use a bit of both for my projects.

This first card is made using the kraft papers. I also used the stamp set and heat embossed the designs in gold.


This next one uses the watercolour papers. I decorated the wooden bee using Dovecraft 3D Pearl Effects. 


Finally I made a spinner card. I didn't send this in for Hochanda as the spinner didn't quite work right and I perhaps need another try. I'd never done it before so let's say I've learnt from it! 


Thanks for stopping by!
Emily xx

Thursday, 18 May 2017

How To Make 3 Cool Cards Using The Dovecraft Monochrome Goody Bag!

Helllooooo!

I have three projects to share today using one of the new 'Goody Bags' from Trimcraft. There are several to choose from and today my projects are from the Monochrome Goody Bag. There are instructions below each image.

Each pack has a selection of 6x6" and 8x8" patterned papers, 6 sturdy coloured 6x6" card blanks with envelopes, sentiments, buttons, flowers and gems, as well as a project sheet to get you started. They're perfect if you're no good at choosing co-ordinating supplies, if you need stash in a particular colour (like I needed some purple things last year so I bought a purple 'goody bag' - this was before I was a Trimmie!). They'd also make a great gift for someone who is just getting into cardmaking or scrapbooking. There are so many possibilities with these goody bags as I am about to show you.


1.       Cut a 14cm square from patterned paper and mount onto black cardstock and cut out, leaving a small border
2.       Position a star die in the centre and die cut.
3.       Cut two pieces of acetate just larger than the aperture, stick the edges together, leaving a gap.
4.       Fill the gap with sequins and then seal.
5.       Stick the pocket behind the aperture and then stick the whole thing to a 6x6” card blank.
6.       Die cut smaller stars from vellum, and ‘happy birthday’ from black cardstock and attach to the card.
7.       Finish with a die cut pennant and spatters of black and gold ink.


 1.       Cut a 14.5cm square from patterned paper. Ink the edges with black ink and then stick to a 6x6” card blank.
2.       Cut a 14cm square from a different sheet. Ink the edges with black ink and then stick to the larger square.
3.       Cut four 6.5, four 6 and four 5.5cm squares from patterned paper. Ink the edges and then stick a small, medium and large square together.
4.       Arrange the four layered squares onto the card and stick down.
5.       Draw around the acetate backing of the large ‘with love’ stamp onto vellum and cut out.
6.       Stamp the ‘with love’ stamp onto the vellum and mount onto patterned paper. Cut out, leaving a small border.
7.       Layer up paper flowers, stick a brad through the centre and through the ‘with love’ piece.
8.       Stick the whole thing to the card. 

1.       Cut a 14.5cm square from patterned paper and stick to a 6x6” card blank.
2.       Cut a 6.5cm square from patterned paper and mount onto black cardstock and cut out, leaving a thin border.
3.       Cut a length of silver thread and loop and stick in the centre of the square.
4.       Die cut two flourishes from black cardstock
5.       Die cut a dragonfly in black and silver and stick the silver on top of the black. Stick on top of the looped thread along with the black flourishes.
6.       Cut two 1.5cm wide strips of patterned paper, invert an end of both, stick to the centre of the card and trim off the ends.
7.       Stick the decorated small square to the centre right of the card.

8.       Finish with a sentiment, buttons and splatters of black ink.

I hope you've been inspired by my cards - I had a fun day making them whilst watching the Formula One!
Thanks for visiting!

Emily xx

Thursday, 11 May 2017

How To Make Super Quick Cards || Simply Creative Around The World

Hi all!

I have another card making tutorial for you today, showing you how to make super quick and easy cards. These are great if you're a beginner or you haven't much time to craft.

These cards are made using the Simply Creative 'Around The World' papers and Dovecraft large sentiment stamps from Trimcraft. I love the little balloons! 


1.       Cut a 9x13.5 rectangle of white cardstock.
2.       Spray blue ink onto plastic packaging and smoosh onto the cardstock. Leave to dry.
3.       Stamp a large ‘happy birthday’ onto the piece of cardstock.
4.       Fussy cut hot air balloons and stick around the sentiment.
5.       Mount the whole thing onto patterned paper and then onto an A6 card blank.


1.       Stamp two balloons in black into onto white cardstock.
2.       Colour the balloons.
3.       Stamp a large ‘thank you’ onto white cardstock.
4.       Cut a square around the sentiment and mount onto patterned paper twice.
5.       Cut a 8x15.5cm rectangle from balloon patterned paper. Mount onto more patterned paper and stick left of centre onto a 6x6” white card blank.
6.       Add two strips of washi tape across the card.
7.       Stick the ‘thank you’ onto the card.
8.       Stick the balloons to the right of the card.

Thanks for stopping by!
Emily xx


Thursday, 4 May 2017

How To Make A Super Sweet Card || Simply Creative 'Make A Wish'

Hi all,

Today I'm going to show you how to make this super sweet card using the Simply Creative 'Make A Wish' papers and First Edition dies from Trimcraft.

 Donut worry, it's super easy! 


1.       Using a compass, draw a circle on white cardstock just smaller than 6 inches in diameter. Cut out and die cut a circle from the centre. If you have a large circle die set you won’t need the compass.
2.       Using 3D Pearl Effects, go around the edges of the donut as well as across the entire donut to look like icing.
3.       Die cut another, smaller donut from patterned paper and stick on top of the larger one.
4.       Die cut sweets from textured cardstock. If any have open areas then back them with patterned paper.
5.       Arrange the sweets around the donut and stick down.
6.       Add 3D Pearl Effects in white to the sweets to make them look shiny.
7.       Stick the donut to a square of patterned paper and then stick to a 6x6” card blank.

8.       Finish with a sentiment in the centre.

Thanks for stopping by!
Emily xx

Thursday, 27 April 2017

Simply Creative Chalkboard Cards!

Hi all!

I have a couple of cards to share today using the Simply Creative 'Chalkboard' papers by Trimcraft.
I have to say black and white is never my crafty cup of tea, despite me dressing in black 90% of the time... ha ha! 
I had to drop some colour in there and here is what I came up with. 

This first one uses the new Dovecraft wooden stamps. I stamped them onto squares of white cardstock and added spray ink to each. 


This next one has a pop of yellow. A lot of the Dovecraft ranges have patterned wooden frames but if you flip them over you can paint whatever colour you want onto the other side. 
The mixed media on this card is spatters of yellow watercolour and the stamps are from the Dovecraft 'Blooming Lovely' collection.

Like the look of the fancy folding on this card? You can follow a tutorial HERE.


Thanks for stopping by!

Emily xx

Thursday, 9 February 2017

Krafting Cards Is Fun!

...That's a pun 'cause the three cards I'm sharing today are all made using Kraft patterned paper.

They are from the Simply Creative 'Kraft Keepsake' paper pads by Trimcraft. There is so much you can do with kraft papers - pair them with bright colours, colour in the patterns, fussy cut designs... and with these I've done just that. 

This first one uses lots of layers and some stitching.


I've coloured in the mandala paper here and fussy cut out. I paired it with the First Edition 'Storyteller' paper pad here. This card was really easy to make and looks so fancy. I love it! 


Finally, some fussy cutting a a chance to use the 'Couture du Jour' leather stickers that I love so much.


To find out how I made these and more, head over to my Trimcraft gallery. (link)

Thanks for stopping by!
Emily xx


Thursday, 12 January 2017

Simply Creative Country Garden Cards

Hi all,

I have some cards to share today using the Simply Creative Country Garden papers from Trimcraft.
The paper pads come in 12x12" and 6x6" and they are pastel colours with some illustrative floral and insect designs in a delicate black line. Very pretty!

Obviously I have to share my favourite first and it's this one where I used floral dies to create a pattern on plain white card and then stuck it onto patterned paper using 3D foam tape.


To find out how I made these cards, head over to my Trimcraft gallery! (LINK)


(I apologise for the Trimcraft spam, they released 8 paper pads at once, and I have to make 5 projects per collection... luckily I don't go back to uni til next week so I've been able to make some headway and as you know I love to be kept busy)

To aid my mission, I created a little reward chart.... I have since completed enough to eat the little Bounty bar!


Thanks for stopping by!
Emily xx


Thursday, 29 December 2016

More Couture du Jour cards!

Hi all,

It's been a very busy Christmas and I haven't had much time to craft. We spent Christmas in Liverpool and it was fabulous. A busy week, then it's New Year,  but hopefully next week things will calm down a bit and I can get back into crafting properly!

I have some more cards to share using the Couture du Jour collection from Trimcraft.


For step by step instructions, head over to my Trimcraft gallery! (link) 

Thanks for stopping by!
Emily xx


Thursday, 8 December 2016

Couture du Jour cards!

Hi all,

I have some cards to share today using the Couture du Jour collection from Trimcraft.


For step by step instructions, head over to my Trimcraft gallery! (Link)

Thanks for stopping by!
Emily xx

Friday, 7 October 2016

Girly MDF Cards!

Hi all,

Some girly cards to share today.


This all started when I was making some steampunk cards and I was colouring in a steampunk stamp. I wanted something a bit different to put behind it and out came my little box of bits from Things To Alter. I found this really cool steampunk piece, a head with gears coming out of the back... I painted it with Distress Paints and stuck the coloured image on top of the head. I used watercolour pencils to colour the image and then went over it with a little water to colour the image. I love how vibrant watercolour pencils are which is why I prefer them over watercolour pens.
The stamp and backing paper are from the Santoro Willow collection by Trimcraft and the sentiment die is by Sizzix.


I used the same watercolour colouring technique with these Belle & Boo stamps (also by Trimcraft, I'm a little addicted to their characters!) This card worked better tiny, it's 4x4" and I would have preferred it on kraft card to match the MDF but I only have white in this size. I layered up the MDF shells, they are the same depth as 3D foam dots so these are perfect to use when you are layering the shapes. 


Thanks for stopping by!
Emily xx

Thursday, 1 September 2016

Scrapped! Sketch Challenge - September 2016 + Tour De Yorkshire Layout

Hi all,

Great news - the first Scrapped challenge has begun over on Facebook!

So if you're a card maker, scrapbooker or any other type of papercrafter, come play along with us!

Anything goes and our challenge this month is to be inspired by this sketch by DT member Michelle Gower


To play along and see what our DT made, head over to our Facebook page now! 
What are you waiting for? Get inspired!

Here is my first project I have made for the challenge and it uses pictures I took when the Tour De Yorkshire ended Day 1 right here in Doncaster. I've been waiting to make this layout for ages and the sketch we are using this month was perfect!


At the event there was a little fete(?) going on with lots of different stalls, food, emergency services giving out free stuff, and the Yorkshire Bank. There was so much going on on the day and me and my dad had a lot of fun looking around and taking in the atmosphere.


Here's a close up of all the embellishments I clustered in the middle. I had so much fun arranging them all and it looks so good!


Thanks for stopping by and I do hope you'll join in with our challenge - it's not just for scrapbookers, anyone can take part, you just need to make something following our sketch. It's just a bit of fun if your mojo has taken a hike!

Emily xx

Friday, 5 August 2016

Scrapped Papercraft Challenge!

Hi all,

Just a quick post -

My ex-Docrafts PDT pals and I have started our own challenge blog.

The first challenge goes live on September 1st and it's all via Facebook.

It's for any type of papercrafts, so if you're a card maker, scrapbooker or anything else and you want some inspiration... anything goes and there's a sketch or a theme or mood board to be inspired by each month.

To find out more and 'like' our page ready for the first challenge to be announced, head over to https://www.facebook.com/scrappedchallenge/ now!


Saturday, 16 July 2016

Birthday Dinos!

Hi all,

Some super cute cards to share today using the Birthday Dinos papers by StickerKitten. You can check out the paper pack here!
If you know me at all you'll know that I love dinosaurs and have done since I was little(er!) I have the Walking With Dinosaurs boxset, I have a dress covered in dinosaurs, I love Jurassic World and not just because of Chris Pratt.... Huge natural history nerd right here. Love it. So when I was offered the chance to have a play with this pack I was super excited! Here's the cards I made.


The pack is 6x6" and printed onto quality 160gsm paper. The paper has a subtle sheen to it which is really nice and the paper is super smooth. There are 30 sheets of 10 designs in the pack. There are some papers with a simple pattern on that you can use for backgrounds and then some with dinosaurs and birthday bits on that you can fussy cut out or use as backing paper. I love papers that have bits you can cut out, it saves you buying extra embellishments are everything you need is already in the paper pack. There are so many options!


This first one uses balloon paper on the background, and a strip across the middle. I fussy cut the little dinosaurs and stuck them on and finally added a die cut sentiment. Simple but super cute!


This is a 4x4" card. I couldn't take how cute the little T-Rex is so I had to cut him out and have him holding onto some huge balloons! 


And finally this one with 4 of the papers layered up, some fussy cut bunting and some die cutting.

Thanks for stopping by and thank you to Sarah for letting me play with her gorgeous paper pack!
I'm planning a scrapbook layout with these papers too, so stay tuned!

Emily xx


Thursday, 30 June 2016

A Little Jar of...... Cards

Hi all,

Been feeling pretty rough the past few days... It all started when I made the decision to 'get fit'. I've never had to before, I used to get picked on for being so skinny.... but my arms are bigger than they should be and I just need to tone up. So I got out some weights, 1kg each, and started doing reps, 20 of this, 20 of that, 10 sit ups, 10 more.... going 'hell for leather', as my mother says.   No one told me I needed to warm up... So I spent Sunday feeling sick as I pulled my stomach and then woke up early Monday morning in agony from my back... I have a cuddly owl that heats in the microwave so I used that... still in pain... took painkillers... luckily my mum came to check if I was ok so she put pain relief cream on my back.. which helped a bit.. but I spent a few days exhausted.
I think from now on I'm just going to watch what I eat. I already cut out fizzy pop but now I'm not going to allow myself to snack....
 I felt back to my regular self yesterday so I baked a cake, started putting together some videos, recording voiceovers... I finished those this morning, made a tag, and knitted a bit more of my dinosaur. But nothing I've finished to share yet!
So today I'm taking a blog post from the 'bank' of posts I've made for times such as this.... sorry but I hope you'll love these cards as much as I do.

I've some cards I made a couple months ago to share today using a stamp set I bought from Fred Aldous in Manchester. It's by Personal Impressions and there's a little jar plus four different 'fillings' such as stars and buttons. Really cute! Here's what I came up with...

(Papermania Craft Collection)

(Bo Bunny Isabella collection)


(Papermania Country Life collection)


Thanks for stopping by! I've a new video to share on Saturday and I can't wait for you all to see it, I've found a new, more professional way of creating my videos that I'm super proud of.

Emily xx

Tuesday, 14 June 2016

Tutorial Tuesday - Photography Tips!

Hi all,

This week's Tutorial Tuesday is not video-based. This week I want to share some photography tips to show off your projects in the best way possible.

  1. You don't need a DSLR to take great photos. (I don't have or want one and photography is one of my hobbies)  A bridge or compact camera or even the camera on your phone is just as good, plus it's less messing around with settings which is always good.
  2. Make sure you have good light. Find a surface near a window and photograph your makes there during the day. If it's a dull, rainy day then just wait for a nicer day.
  3. If you do have a camera with different settings, see if you have 'expressive' mode - it makes the colours really 'pop'.
  4. The background should be either the wall that's already there or blu-tacked scrapbook paper (if you want something more colour specific or your wall is really 'busy'). A too-busy background can distract from your project.
  5. If you can, stand/sit further back and use the zoom function. This will blur the background (this works best if your project is about a metre from the background).
  6. When photographing cards, have them side-on to the light. That way you get graduated light against the card and it looks more natural.
  7. Buy a mini-easel from The Works. They're super cheap and great for photographing smaller makes such as mini cards, tags and smaller scrapbook layouts such as 8x8".
  8. You don't necessarily need a tripod for photographing cards, just a steady hand. However, if you find your pictures are blurred, tripods are not that expensive.
  9. Don't post blurred pictures to a gallery or blog. Seeing those is my pet hate - it just makes me think, could you not have spent ten more seconds having another go? If you're in a rush, leave it for another day. (rant over)
  10. For large scrapbook layouts, find a wall near a window with good light. Stick the layout to the wall using blu-tack and try and get it straight - use pictures or anything else on the wall as a guide. For this you ought to use a tripod so you get the picture dead square and not angled in any way. Set the tripod up so it's the same height as your layout. If you have a camera with a grid on the display, use this to help you. 
  11. You don't need Photoshop - the default photo editor on Windows 10 works just as well. Instagram is great for quick editing and sharing too. 
  12. If setting up each time you have made something is a bit too much 'faff', then why not save them until you have a few to photograph, then do them all at once?
  13. You can use props in your pictures to add some interest - think buttons, jewellery, candles, boxes (if you have a few makes you want to photograph, showing them on different levels can look fab!), art supplies... but don't overdo it and don't think you have to use any props at all. I personally don't like to but I know a lot of people do.
  14. Think about the purpose of what you have created. If you've decorated a box - fill it. If you've upcycled a jar - show it with some paintbrushes in. If you've decorated a frame - put a picture in it. If you've made something that hangs, hang it.
  15. If you're blogging and want to show specific details or techniques, then of course take works-in-progress or close ups of the finished article - it really helps to show what you are explaining on your blog post.
Aaaand I think that'll do for now - Any questions, just ask! 
Emily xx

Saturday, 11 June 2016

Father's Day Cards

Hi all,

With just over a week to go until Father's Day, there's still time to make a card and here are some I have made if you need any inspiration!


 Thanks for stopping by!
Emily