.

.

.

.

Showing posts with label pink. Show all posts

Thursday, 6 July 2017

How To Love Your Sequins! || Flamingo Cards || First Edition 'Sweet Nothings'

Hi all,

So you know I'm obsessed with flamingos...?
And shiny things?
Here are a couple ideas for you to use your sequins. 
These cards are made using the First Edition 'Sweet Nothings' papers from Trimcraft. 


  1. Cut a pink tag from the cut apart sheet in the 12x12" Sweet Nothings paper pad. Use it as a template to cut a tag from white cardstock too.
  2. Die cut a flamingo from the pink tag. 
  3. Using 3D foam, stick the flamingo tag to the white tag.
  4. Put glue in the aperture and add sequins.
  5. Add strips from the cut apart sheet to the bottom of the tag. Add twine to the top of the tag.
  6. Die cut a sentiment from patterned paper and stick to the bottom of the tag.
  7. Use a green gelato or watercolour paint to colour a small white doily. Stick this behind the tag once dry.
  8. Cover a plain frame with patterned paper and stick behind the doily & tag.
  9. Behind these stick a scrap of patterned paper.

  10. On a 6x6" card blank, layer up a 14 and 13.5cm squares of patterned paper.
  11. Stick the tag layers onto the card, sandwiching silver thread while doing so.


  1. Cover an A6 card blank with patterned paper.
  2. Cut a 14.5x10cm piece of white cardstock.
  3. Lightly draw a teardrop shape on its side towards the bottom of the piece of cardstock. 
  4. Add blue and silver sequins using glue.
  5. Around the edge of this and around the edge of the piece of cardstock, odd dots of 3D pearl effects.
  6. Add a die cut flamingo and die cut sentiment.
  7. Finish with more dots and adhesive gems, then stick to the covered card blank.


Thanks for stopping by!
Emily xx

Thursday, 15 June 2017

I Think Pink Is My Colour || Card Tutorials || Dovecraft Pink Goody Bag

Hi all,

I have some cards to share today, along with some step by step instructions so you can try making them for yourself. 
They are all made using the Dovecraft pink goody bag from Trimcraft (they come in other colours too, I received the pink and black in my design team kit.) I also used a little of the black for one of the cards.


  1.  Cut two 5x14cm rectangles from textured cardstock. Mark the centre both vertically and horizontally and die cut a heart directly in the centre. Die cut another equidistant from this heart and the top, and the same from the bottom. Do this for the other piece of cardstock too.
  2. Cut another 5x14cm piece, this time from patterned paper. Add three of the die cut hearts down the centre, using the pieces you cut them from as a template. Use 3D foam tape for this so they stand out. Add 3D pearl effects around the edges of the top and bottom.
  3. Cut two more 5x14cm pieces of patterned paper. Using the pieces the hearts are die cut from, stick them on top with 3D foam dots. 
  4. In the top heart of one and bottom of the other, stick small buttons.
  5. In the top and bottom of the opposites, die cut a filigree heart and add to the centre.
  6. Arrange all three pieces on a 6x6" card blanks.
  7. Finish with a sentiment and adhesive gems.


  1. Cut a piece of patterned paper to 14.5cm square and stick to a 6x6" card blank.
  2. Layer up paper flowers, alternating between pink and black. Add a large adhesive gem in the centre. Stick to a die cut star. Add thread behind each layer to add texture.
  3. Stick this to two small rectangles of patterned paper and then stick to the card.
  4. Die cut small gears and tuck in between the flowers and layered papers.
  5. Die cut a sentiment and stick to the card.
  6. Add ribbon on either side of the card.
  7. Finish with ink spatters.


  1. Take a card blank from the goody bag.
  2. Using small heart dies, arrange on the card blank front and die cut. Keep going until there are apertures across the front of the card.
  3. Using up scraps, stick a scrap behind each aperture and leave to dry.
  4. Add patterned paper on the inside of the card to cover up the back of the scraps and ensure a professional finish for your recipient.
  5. Finish with a sentiment. 
Thanks for stopping by!
Emily xx

Tuesday, 9 May 2017

#Snapchat || Scrapbook Layout || Dovecraft 'Kiss & Make Up'

Hi all,

I have a scrapbook layout to share today using the Dovecraft 'Kiss & Make Up' collection from Trimcraft. It's just so cool, right? I also used some machine stitching on this. It's optional but gives such a great effect (except when it comes unthreaded and the air turns blue.... ). There's a tutorial on how to make it below the picture. 


So, the pictures. My cousin Caroline and I were messing around on Snapchat at our grandparents' house at Easter. At the time I had a Windows phone so didn't even know what Snapchat really was.... I know, right?! On the day of writing I should be getting an iPhone.... not my birthday yet but my OH doesn't want me "crying" over a glitchy phone any longer... 


Instructions!

1.       Using an old credit card or a palette knife, spread a layer of gesso across the centre of a 12x12” sheet of textured, coloured cardstock and allow to dry.
2.       Spray red ink across the centre of the page. You can use a stencil if you want.
3.       Print your photos at 2x3”. Mount them onto tissue paper and then onto patterned paper.
4.       Stick both onto a piece of patterned paper and mount onto another. Stick this onto white tissue paper.
5.       On the left side of this, stick three patterned tags so they are peeking out from behind. Stick the whole thing in the centre of the layout.
6.       In the top left and bottom right, stick lengths of washi tape and ribbon.
7.       (Optional) Using a sewing machine and various colours of thread, stitch along the ribbon and washi tape with straight and zigzag stitches. Also stitch around the photos and a zigzag down the left side.
8.       Ball up your offcuts of thread and stick behind your photos.

9.       Finish with brads, tags and chipboard stickers.

Thanks for stopping by!
Emily xx 
Saturday, 18 March 2017

Mother's Day Cards || Dovecraft Kiss & Make Up

Happy Saturday!

I am back with more Mother's Day inspiration and today's inspiration is a card using the Dovecraft Kiss & Make Up collection from Trimcraft.

This one is for my boyfriend to give to his mum....she's just about the coolest person I know and this collection is just perfect for a card for her.


I'll be back with some final Mother's Day inspiration on Thursday but if you can't wait that long then take a peek at my other Mother's Day cards on my Trimcraft gallery (link).

Emily xx

Thursday, 7 July 2016

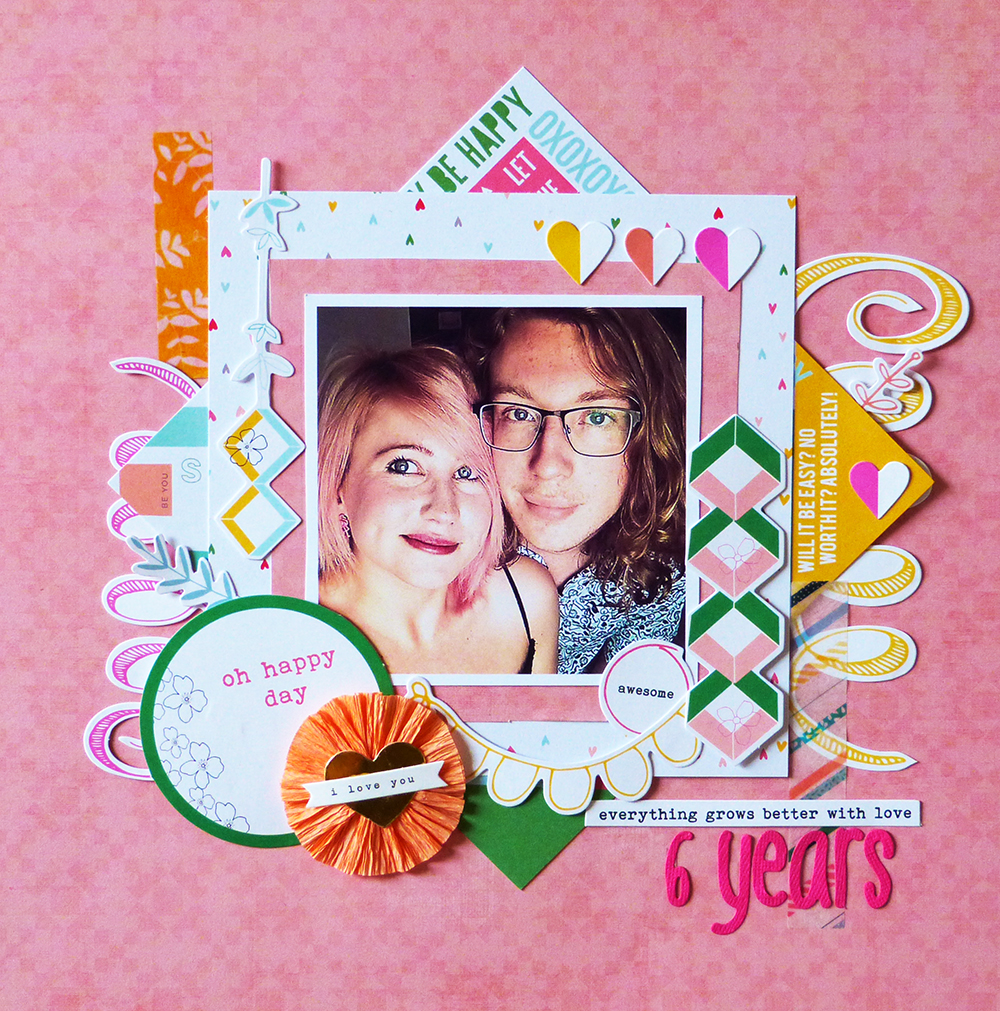
Playing With Pinkfresh Studio 'Felicity'

Hi all,

Apologies for my absence, I was in Chester with Nathan for our anniversary.
We stayed at Cheshire Oaks, we like to stay somewhere where there's somewhere to wander around at night.
It took us four hours to get there, on the M62 it said 'long delays' so we kept going... for it to say it was then closed so we had to take a detour between Huddersfield and Oldham... a pretty scary experience, Google Maps was taking us on these roads wide enough for one car, down these massive hills (by that, I mean in first gear with the clutch down and controlling it with the brake... it was still going 20mph!)...but we got there eventually, unscathed!
Anyway, we spent the rest of the day in Chester, then the next day, our anniversary, we spent at the zoo and then went on to see The Secret Life Of Pets (really good!) and had dinner at Wagamama. I had duck for the first time and it was delicious.

Anyway, on to my layout. I used a selfie we took in the hotel once we had got ready for our evening out.


A few weeks ago I saw a bundle of Pinkfresh Studio 'Felicity' goodies on a selling page on facebook, a 6x6 paper pack, washi stickers, ephemera and some little sequins for £10 so I pounced... and kept the set for this layout (and another that I made today - stay tuned!). 

The backing paper is from the September Skies ppad by Heidi Swapp. This layout is mounted onto another sheet of paper but it photographed odd so I cropped it out. 

Thanks for stopping by!
Emily xx

Saturday, 28 November 2015

An update and a brand new layout!

Hi all

Been so busy lately... uni is such a pain in that you get nothing to do for weeks and then the deadlines approach and it's worth making a start so Nathan and I have been doing some photography and filming this week. Luckily I enjoy the photography aspect (most of the time!). Here's a portrait I took of Nathan. (I had to stand on a bench to get a decent angle. I hate being 4'11") Glad he's still wearing the scarf I knitted for him last year! :)
Also when I was shopping with my parents last week I picked up some new supplies, a set of ink pads and a My Mind's Eye chipboard embellishment set from TKMaxx. It's actually a better store for crafts than Hobbycraft because there's always something that little bit different. I couldn't resist the chipboard, especially as it has lots of gold foiling and I do love some sparkle. 


So, I had to have a picture to make a layout using those embellishments (obviously!) so I asked Nathan if he would take a selfie with me.
It's a bit different to what I usually do, more simple, but it works better that way I think. I tried to do an 'ombre' thing with the papers and embellishments to match the background paper... it kind of worked until I added the chipboard but then having a hint of pink at the bottom and a hint of teal at the top balances it out.


Thanks for stopping by!
Emily xx


Saturday, 17 October 2015

(Nearly) Blondes Have More Fun! (Scrapbook Layout)

Hi all

A new layout to share. It's mixed media using a tissue paper background. When I buy something and it comes in tissue paper I always save it, it comes in handy if you're after something unique. (if you'd like to find out how to make the background you can check out Katie's blog HERE). Once the background dried I added touches of distress paint and spray ink.
Here's my layout.


(Anyway...
The story of My Hair goes: Dyed it red at age 14, alternated between that and purple until last year-ish when I thought "hey, blonde would look cool". Red doesn't fade, ever, so 2 applications of 'intensive lightener' later and I'm (nearly) blonde. )

Until next time...!


Saturday, 19 September 2015

Bee Mixed Media Layout

Hi all,

After experimenting with my new Distress Paints I wanted to make a layout using them.

The paper I used is DCWV Text/Photo Solids/Overlay, the plain black paper with a smooth shiny finish - I wanted something strong to hold the paint without any buckling.
To start with I put paint on different pars of the layout and blended the areas together a little with my finger.
I spattered water all over before it was dry, just to see what would happen. After about 5 mins I wiped the water off and it took away the paint that was underneath, leaving the dots you can see in this picture.
Then I used different ink sprays on it and let them drip down.


And here's the layout I came up with. I used the BoBunny papers that came with Cardmaking & Papercraft.
I didn't want to use too much paper and embellishments because I wanted to let the background show.


The frame is Papermania Bellissima painted with the Distress Paints.
The twine is from TKMaxx. It's really thick and lovely to work with.
The flowers are plain purple from Hobbycraft with ink dropped onto them.

And here's a closeup. I made a little shaker element with plastic packaging and sequins.


Thanks for stopping by!

Emily x