.

.

.

.

Saturday, 19 September 2015

Bee Mixed Media Layout

Hi all,

After experimenting with my new Distress Paints I wanted to make a layout using them.

The paper I used is DCWV Text/Photo Solids/Overlay, the plain black paper with a smooth shiny finish - I wanted something strong to hold the paint without any buckling.
To start with I put paint on different pars of the layout and blended the areas together a little with my finger.
I spattered water all over before it was dry, just to see what would happen. After about 5 mins I wiped the water off and it took away the paint that was underneath, leaving the dots you can see in this picture.
Then I used different ink sprays on it and let them drip down.


And here's the layout I came up with. I used the BoBunny papers that came with Cardmaking & Papercraft.
I didn't want to use too much paper and embellishments because I wanted to let the background show.


The frame is Papermania Bellissima painted with the Distress Paints.
The twine is from TKMaxx. It's really thick and lovely to work with.
The flowers are plain purple from Hobbycraft with ink dropped onto them.

And here's a closeup. I made a little shaker element with plastic packaging and sequins.


Thanks for stopping by!

Emily x


Wednesday, 16 September 2015

Don't be afraid to experiment! (Distress Paint)

Hi everyone,

Picked up some real bargains at the weekend. The garden centre we usually go to while visiting my grandparents is stopping selling craft supplies (Boo!) but on the flipside, I got these lovely goodies half price.


I've never used Distress Paint before. But I do like to experiment with mixed media... So onto Youtube I went and I watched Tim Holtz show a couple techniques...

Then I had a play for myself. Just trying different layers of paint, adding water, adding spray ink both by misting and dripping onto the tag.
Once that dried, on the top left I used the blue paint on a stamp. This would work better on a less detailed stamp - when dry it didn't really look like anything so I went over it with a gel pen.
The top right is stamped and then sprayed with purple 'Cosmic Shimmer' ink.
First on the bottom row is stamped with a lime ink pad, the second is the same in blue. I do love Kaisercraft stamps...
Third is dripping inks in a row to follow the line of the paint.
And lastly stamped with a 3D butterfly at the bottom. Not because I messed up and needed a 3D butterfly to cover it up...


So, don't be afraid to experiment! Some of these I might not use, but it's practice with them so I know how to use them properly. If you've got a spare hour, just have a play with something you've not used before. 

I can't wait to use these paints on a new layout..!

Emily x


Sunday, 13 September 2015

A(nother) Selfie Layout

Hi all! Hope you've had a good weekend.

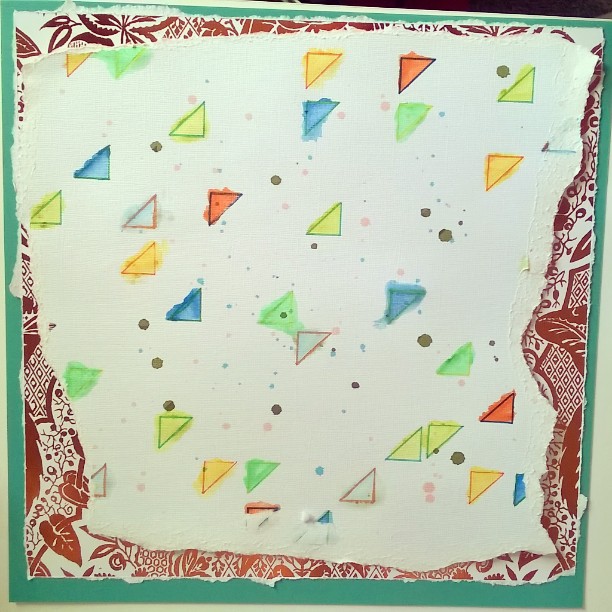
Been trying to think outside the box a bit more with my scrapping lately. Here's the background I came up with, using watercolour pencils on a stencil and outlining them with watercolour pens.
I ripped it, and layered it onto foiled paper (you can't tell from the photo..) and then onto plain teal paper. Colours I wouldn't normally use (orange is my least favourite) but it felt right using them so I just went with it. 


So the other day I went for a walk to the retail park with my better half.. I couldn't waste one of the last warm days we'll get this year. I picked up these fab My Mind's Eye goodies in TKMaxx.

I couldn't wait to use them on a layout. 
So I take a lot of selfies with my fella. What of it? At least then I've always got something to scrap...


One thing I'll say is that I shouldn't have stuck those flowers on with a glue gun... in retrospect I should've left them out and added more stencilled triangles instead. Ah well. 

Until next time...!


Wednesday, 9 September 2015

Christmas In September

Hi all,

Docrafts sent me a box of Christmas goodies for the Project Design Team so I eased myself into the festive spirit by making some Christmas cards. I'll admit I'm not the best cardmaker, but I think this time I've done well (thanks to Pinterest!).

This first card is using the Papermania Jolly Santa collection.

And the next two using Papermania Folk Floral - my favourite new collection from docrafts. I love the bright colours!


Thanks for stopping by!

Emily xx


Monday, 7 September 2015

Docrafts Creativity Issue 62 Scan!

Hi all
Just a quick post today (I spent all day recording a new video which will be up soon!)
Docrafts Creativity Issue 62 came through my letterbox today, and here's my feature made using the new Papermania Folk Christmas collection. Out of all docrafts' new ranges this one has to be my favourite because I love the bright colours.


Thanks for stopping by!

Saturday, 5 September 2015

Birthday layout

Hi all

Before I immerse myself into the behemoth that is Christmas Crafting, I made a layout using pictures from my birthday and party.

I hand drew the bubble writing... Just drawing guide lines and filling them in with colour is all you need to do!
To get your pictures into 'film strips', first crop them into squares (or use instagram and save the pictures from Facebook) and when you go to print, select up to nine photos and print wallet size on A4 which prints 9 to a page. The pictures will all be lined up ready to cut out.

Music has always inspired my creative work. The title "Twenty One & Invincible" is the title of a Something Corporate song I loved when I was younger,  and still do. If you want a listen, it's HERE. 

Have a good weekend!
Emily xx


Wednesday, 2 September 2015

Folk Floral Planner

Hi all

Here to share something I've been wanting to make for a while - a flip planner.

When the Papermania Folk Floral collection arrived for me to play with,, courtesy of docrafts, I knew that this project was perfect to use with the collection's decoupage papers and die cut embellishments.


To make it, I cut out 6 A5 rectangles from cardboard, covered them in decoupage paper, added a calendar, and finally co-ordinating embellishments.
To find out more head over to the docrafts website where there's a step by step (X)
Until next time...!